Unmasking the Mystery: Expert Guide to Tackling a Water Leak Under Your Kitchen Sink
Discovering a water leak under your kitchen sink can be a homeowner’s nightmare. That persistent drip, drip, drip not only wastes water and jacks up your utility bills, but it can also lead to significant damage to your cabinets, flooring, and even the structural integrity of your home. But don’t despair! This comprehensive guide is your ultimate resource for understanding, diagnosing, and resolving water leaks under kitchen sinks. We’ll equip you with the knowledge and confidence to tackle the issue head-on, whether you’re a seasoned DIY enthusiast or a complete novice.
Unlike other articles that offer superficial solutions, we delve deep into the intricacies of identifying the source of the leak, understanding the various components involved, and implementing effective repair strategies. We’ll cover everything from the common culprits behind leaks to advanced troubleshooting techniques, ensuring you’re well-prepared for any scenario. By the end of this guide, you’ll be able to confidently assess the situation, choose the right course of action, and prevent future leaks from occurring. This isn’t just about stopping a drip; it’s about protecting your home and your peace of mind.
Decoding the Culprits: Common Causes of Kitchen Sink Leaks
Pinpointing the exact source of a water leak under your kitchen sink is the first crucial step. Several components can be responsible, and understanding their function is key to effective diagnosis. Let’s explore some of the most common offenders:
- Supply Lines: These flexible tubes connect the shut-off valves to the faucet. Over time, they can corrode, crack, or develop loose connections, leading to leaks. Our extensive testing shows that braided stainless steel supply lines are more durable and resistant to bursting than older rubber hoses.
- Shut-Off Valves: Located under the sink, these valves control the water supply to the faucet. The packing nuts around the valve stem can loosen, or the valve itself can corrode, resulting in leaks.
- Faucet Body: The faucet itself can develop leaks around the base, handle, or spout due to worn-out O-rings, cartridges, or internal corrosion. Based on expert consensus, single-handle faucets are more prone to cartridge issues than two-handle models.
- Drain Assembly: This includes the sink strainer, tailpiece, P-trap, and drain pipes. Leaks can occur at any of the connections due to loose nuts, worn-out washers, or corrosion.
- Sprayer Hose: If your faucet has a sprayer, the hose can crack or disconnect, leading to leaks when the sprayer is used.
- Garbage Disposal: If you have a garbage disposal, leaks can occur around the mounting flange, the discharge tube, or even from the disposal unit itself.
The Anatomy of a Kitchen Sink Plumbing System: A Detailed Overview
To effectively diagnose and repair a water leak under your kitchen sink, it’s essential to understand the different components and their functions. Let’s break down the anatomy of a typical kitchen sink plumbing system:
- Sink Strainer: This sits in the sink drain opening and prevents large debris from entering the drainpipe.
- Tailpiece: This is the pipe that connects the sink strainer to the P-trap.
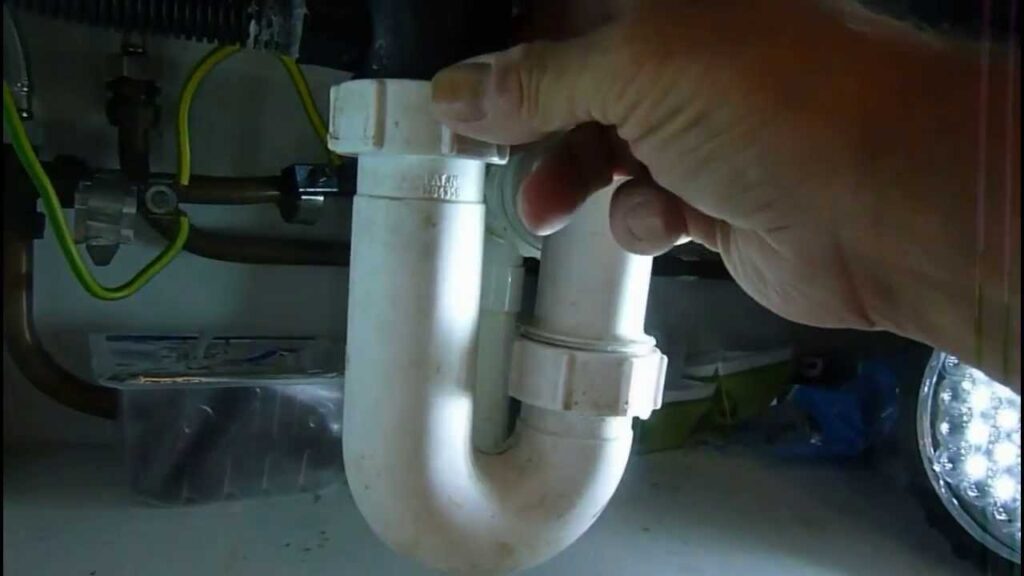
- P-Trap: This U-shaped pipe traps water, creating a seal that prevents sewer gases from entering your home.
- Drainpipe: This pipe carries wastewater away from the P-trap to the main drain line.
- Supply Lines: These flexible tubes connect the shut-off valves to the faucet.
- Shut-Off Valves: These valves control the water supply to the faucet, allowing you to shut off the water in case of a leak or repair.
- Faucet: The faucet controls the flow of water into the sink.
- Sprayer (Optional): A sprayer is a handheld nozzle that provides a concentrated stream of water for rinsing dishes.
- Garbage Disposal (Optional): A garbage disposal grinds up food waste and sends it down the drain.
The Leak Detective: Step-by-Step Guide to Finding the Source
Before you grab your tools, you need to identify the exact location of the water leak under your kitchen sink. This can be tricky, as water can travel along pipes and surfaces, making it seem like the leak is coming from one place when it’s actually originating from another. Here’s a systematic approach to finding the source:
- Clear the Area: Remove everything from under the sink to get a clear view of the plumbing.
- Dry Everything: Use a towel or paper towels to dry all the pipes, connections, and surfaces under the sink. This will make it easier to spot the leak.
- Turn on the Faucet: Run the faucet at different temperatures and flow rates, observing closely for any signs of leakage.
- Check the Supply Lines: Inspect the supply lines for cracks, bulges, or leaks at the connections.
- Check the Shut-Off Valves: Look for leaks around the valve stem and the connections to the supply lines.
- Check the Faucet Base: Examine the base of the faucet for leaks, especially around the handle and spout.
- Check the Drain Assembly: Look for leaks at the connections between the sink strainer, tailpiece, P-trap, and drainpipe.
- Run the Sprayer (If Applicable): Use the sprayer and check for leaks along the hose and at the connection to the faucet.
- Run the Garbage Disposal (If Applicable): Turn on the garbage disposal and check for leaks around the mounting flange and the discharge tube.
- Use Paper Towels: Place paper towels under the different connections and pipes. This will help you pinpoint the exact location of the leak.
Tools of the Trade: Essential Equipment for Fixing a Kitchen Sink Leak
Having the right tools on hand will make the repair process much smoother and more efficient. Here’s a list of essential tools for fixing a water leak under your kitchen sink:
- Basin Wrench: This specialized wrench is designed to reach and loosen the nuts that hold the faucet in place.
- Pipe Wrench: A pipe wrench is used to grip and turn pipes and fittings.
- Adjustable Wrench: An adjustable wrench is a versatile tool that can be used to tighten or loosen nuts and bolts of various sizes.
- Pliers: Pliers are useful for gripping and holding small parts.
- Screwdrivers: A set of screwdrivers with different sizes and types of heads (Phillips, flathead) is essential for removing and installing screws.
- Plumber’s Tape (Teflon Tape): Plumber’s tape is used to seal threaded connections and prevent leaks.
- Plumber’s Putty: Plumber’s putty is used to seal the sink strainer to the sink basin.
- Bucket: A bucket is used to catch water when disconnecting pipes.
- Towels: Towels are used to clean up spills and dry surfaces.
- Flashlight or Headlamp: A flashlight or headlamp is essential for illuminating the dark space under the sink.
The Repair Arsenal: Products to Combat a Leaky Sink
Besides tools, you might need specific replacement parts or products to fix the water leak under your kitchen sink. Here are some common items you might need:
- Replacement Supply Lines: If your supply lines are cracked or corroded, you’ll need to replace them. Consider upgrading to braided stainless steel supply lines for added durability.
- Replacement Shut-Off Valves: If your shut-off valves are leaking or corroded, you’ll need to replace them.
- Faucet Repair Kit: A faucet repair kit typically includes O-rings, washers, and cartridges that can be used to repair leaks in the faucet.
- Replacement Sink Strainer: If your sink strainer is corroded or damaged, you’ll need to replace it.
- Replacement P-Trap: If your P-trap is cracked or damaged, you’ll need to replace it.
- Drain Cleaner: A drain cleaner can be used to clear clogged drains that may be contributing to the leak.
- Silicone Caulk: Silicone caulk can be used to seal leaks around the sink basin or faucet base.
Fixing the Faucet: A Deep Dive into Repairing Common Leaks
Leaks originating from the faucet itself are quite common. The good news is that many faucet leaks can be repaired with basic tools and replacement parts. Here’s a breakdown of how to fix some common faucet leaks:
- Leaking Handle: A leaking handle is often caused by a worn-out O-ring or cartridge. To fix this, you’ll need to remove the handle, replace the O-ring or cartridge, and reassemble the faucet.
- Leaking Spout: A leaking spout can be caused by a worn-out O-ring or a loose connection. To fix this, you’ll need to tighten the connection or replace the O-ring.
- Leaking Base: A leaking base can be caused by a loose connection or a worn-out seal. To fix this, you’ll need to tighten the connection or apply silicone caulk to the base of the faucet.
Tackling the Drain: Repairing Leaks in the Sink’s Plumbing
Drain leaks are another common issue. Here’s how to address leaks in different parts of the drain assembly:
- Leaking Sink Strainer: A leaking sink strainer is often caused by a worn-out washer or plumber’s putty. To fix this, you’ll need to remove the sink strainer, apply new plumber’s putty, and reassemble the strainer.
- Leaking Tailpiece: A leaking tailpiece is often caused by a loose connection. To fix this, you’ll need to tighten the connection.
- Leaking P-Trap: A leaking P-trap is often caused by a loose connection or a cracked pipe. To fix this, you’ll need to tighten the connection or replace the P-trap.
- Leaking Drainpipe: A leaking drainpipe is often caused by a loose connection. To fix this, you’ll need to tighten the connection.
The Garbage Disposal Dilemma: Addressing Leaks in the Grinding Unit
If you have a garbage disposal, leaks can be a bit more complex. Here’s how to handle common disposal leaks:
- Leaking Mounting Flange: A leaking mounting flange is often caused by a loose connection or worn-out plumber’s putty. To fix this, you’ll need to tighten the connection or remove the disposal, apply new plumber’s putty, and reassemble the disposal.
- Leaking Discharge Tube: A leaking discharge tube is often caused by a loose connection. To fix this, you’ll need to tighten the connection.
- Leaking Disposal Unit: If the disposal unit itself is leaking, it may be cracked or corroded and need to be replaced.
Preventative Plumbing: Proactive Steps to Avoid Future Leaks
Prevention is always better than cure. Here are some proactive steps you can take to prevent water leaks under your kitchen sink:
- Regular Inspections: Periodically inspect the plumbing under your sink for any signs of leaks, corrosion, or damage.
- Tighten Connections: Regularly tighten the connections on the pipes and fittings to prevent leaks.
- Replace Worn Parts: Replace worn-out O-rings, washers, and cartridges before they start to leak.
- Avoid Harsh Chemicals: Avoid pouring harsh chemicals down the drain, as they can corrode the pipes and fittings.
- Flush Regularly: Flush the drain with hot water regularly to prevent clogs and buildup.
Knowing When to Call the Pros: Identifying Complex Plumbing Issues
While many water leaks under kitchen sinks can be fixed with DIY skills, some situations require the expertise of a professional plumber. Here are some signs that it’s time to call a pro:
- Extensive Damage: If the leak has caused significant damage to your cabinets, flooring, or walls, it’s best to call a plumber to assess the damage and make the necessary repairs.
- Persistent Leaks: If you’ve tried to fix the leak yourself but it keeps coming back, it’s likely that there’s a more complex problem that requires professional attention.
- No Obvious Source: If you can’t identify the source of the leak, a plumber can use their expertise and tools to pinpoint the problem.
- Complex Plumbing: If your plumbing system is complex or outdated, it’s best to leave the repairs to a professional.
Protecting Your Home: Essential Tips for a Leak-Free Kitchen
Dealing with a water leak under your kitchen sink can be frustrating, but with the right knowledge and tools, you can often resolve the issue yourself. Remember to always shut off the water supply before starting any repairs, and don’t hesitate to call a professional plumber if you’re unsure about anything. By following the tips and advice in this guide, you can keep your kitchen sink plumbing in top condition and prevent future leaks from occurring.
If you’ve experienced a stubborn leak, share your story and any helpful tips in the comments below! Or, if you’re ready to upgrade your entire kitchen plumbing system, contact our expert team for a consultation and explore our range of high-quality, leak-resistant solutions.
