The Definitive Guide: How to Polish a Sam Browne Belt to a Mirror Shine
A Sam Browne belt is more than just a piece of leather; it’s a symbol of authority, tradition, and excellence. Whether you’re a member of law enforcement, the military, or a historical reenactor, maintaining the pristine condition of your Sam Browne belt is paramount. A dull, scratched, or poorly polished belt detracts from the overall impression. This comprehensive guide provides a step-by-step approach to achieving a mirror shine on your Sam Browne belt, ensuring it reflects the pride and professionalism you embody. We’ll cover everything from initial preparation to advanced techniques, leaving no detail overlooked. This isn’t just about polishing leather; it’s about upholding a standard.
Understanding the Sam Browne Belt and Leather Care
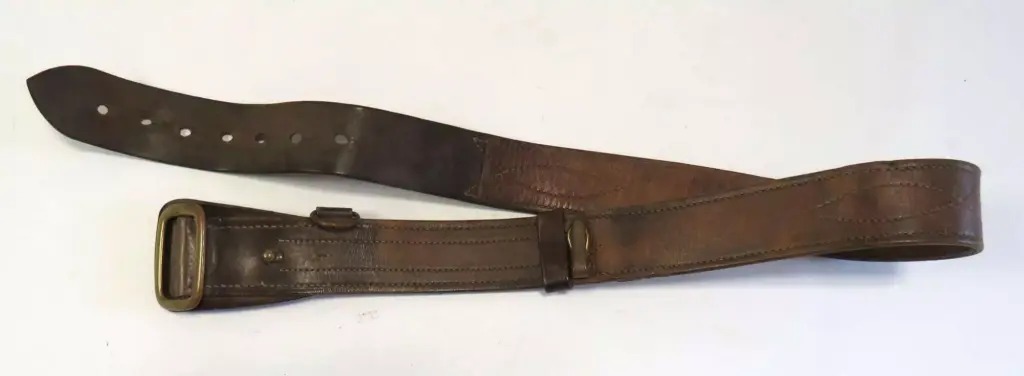
The Sam Browne belt, named after General Sir Sam Browne, a British Indian Army officer, was designed for practicality and functionality. Its construction typically involves high-quality leather, often vegetable-tanned, known for its durability and ability to hold a shine. Understanding the type of leather your belt is made from is the first step in proper care. Different tanning processes require slightly different approaches. However, the core principles remain the same: clean, condition, and polish.
Leather, being a natural material, requires regular maintenance to prevent it from drying out, cracking, or becoming discolored. Neglecting your Sam Browne belt can lead to irreversible damage, compromising its structural integrity and aesthetic appeal. Regular cleaning removes dirt, sweat, and other contaminants that can degrade the leather over time. Conditioning replenishes the natural oils, keeping the leather supple and preventing it from becoming brittle. Finally, polishing creates a protective layer and enhances the appearance, giving it that coveted mirror shine.
Essential Supplies for Polishing Your Sam Browne Belt
Before you begin, gather the necessary supplies. Using the right tools and products will not only make the process easier but also ensure the best possible results. Here’s a comprehensive list:
- Saddle Soap: For cleaning the leather and removing dirt and grime.
- Leather Conditioner: To replenish the natural oils and prevent the leather from drying out. Look for conditioners with natural ingredients like beeswax or lanolin.
- Leather Polish (Cream or Paste): Choose a high-quality polish that matches the color of your belt. Kiwi and Lincoln are trusted brands.
- Soft Cloths: Several clean, soft cloths are essential for cleaning, conditioning, and polishing. Microfiber cloths are ideal.
- Daubers or Applicator Brushes: For applying polish evenly and reaching tight areas.
- Horsehair Brush: For buffing the leather to a shine. A high-quality brush is crucial for achieving a mirror finish.
- Water: Clean, lukewarm water for cleaning.
- Optional: Cotton Balls or Pads: For applying polish in thin, even layers.
- Optional: Heat Gun or Hair Dryer: To gently warm the leather and help the polish penetrate. Use with caution and at a low setting.
Step-by-Step Guide: Achieving a Mirror Shine
Now that you have your supplies, let’s move on to the polishing process. Follow these steps carefully to achieve a professional-looking mirror shine on your Sam Browne belt.
Step 1: Cleaning the Leather
Begin by cleaning the leather with saddle soap. Dampen a soft cloth with lukewarm water and apply a small amount of saddle soap. Gently rub the cloth over the entire surface of the belt, creating a lather. Pay attention to areas that are particularly dirty or stained. Once you’ve cleaned the entire belt, wipe away any excess soap with a clean, damp cloth. Allow the belt to air dry completely before moving on to the next step. Avoid placing the belt in direct sunlight or near a heat source, as this can cause the leather to dry out and crack.
Step 2: Conditioning the Leather
Once the belt is dry, apply a leather conditioner. This will replenish the natural oils and prevent the leather from becoming brittle. Apply a small amount of conditioner to a clean cloth and gently rub it into the leather. Ensure that the conditioner is evenly distributed and that all areas of the belt are covered. Allow the conditioner to soak into the leather for at least 30 minutes, or preferably overnight. This will give the leather ample time to absorb the oils and become more supple. Wipe away any excess conditioner with a clean cloth.
Step 3: Applying the First Layer of Polish
Now it’s time to apply the first layer of polish. Using a dauber or applicator brush, apply a thin, even layer of polish to the entire surface of the belt. Work the polish into the leather in a circular motion, ensuring that all areas are covered. Avoid applying too much polish at once, as this can lead to a buildup and make it difficult to achieve a smooth, even shine. Allow the polish to dry completely before moving on to the next step. This may take several hours, depending on the type of polish you’re using.
Step 4: Buffing the First Layer
Once the first layer of polish is dry, buff the leather with a horsehair brush. Use long, smooth strokes to buff the entire surface of the belt. Apply moderate pressure, but avoid pressing too hard, as this can damage the leather. The goal is to create a smooth, even surface that reflects light. Buffing can take some time, so be patient and persistent. The more you buff, the better the shine will be. After buffing, wipe the belt with a clean, soft cloth to remove any remaining polish residue.
Step 5: Applying Additional Layers of Polish (Optional)
For an even deeper shine, you can apply additional layers of polish. Repeat steps 3 and 4 as many times as desired, allowing each layer of polish to dry completely before buffing. The more layers you apply, the deeper and more reflective the shine will be. However, be careful not to apply too many layers, as this can lead to a buildup and make it difficult to achieve a smooth, even finish. In our experience, 2-3 layers are usually sufficient to achieve a mirror shine.
Step 6: The Spit Shine Technique (Advanced)
The spit shine technique is an advanced method for achieving an even higher level of shine. This technique involves applying a very thin layer of polish to the leather, followed by a few drops of water. Use a clean cloth to gently rub the polish and water into the leather in a circular motion. The water helps to create a smooth, even surface that reflects light. Continue rubbing until the polish is dry and the leather is smooth and shiny. Repeat this process several times, applying thinner and thinner layers of polish each time. The spit shine technique requires patience and practice, but the results are well worth the effort.
Step 7: Final Buffing and Inspection
Once you’ve achieved the desired level of shine, give the belt a final buffing with a clean, soft cloth. This will remove any remaining polish residue and enhance the overall appearance. Inspect the belt carefully for any imperfections or areas that need additional attention. If necessary, repeat the polishing process in those areas. Once you’re satisfied with the results, your Sam Browne belt is ready to wear with pride.
Choosing the Right Leather Polish: Cream vs. Paste
Leather polish comes in two main forms: cream and paste. Both types can be used to achieve a shine, but they have different properties and are best suited for different purposes. Cream polishes are typically easier to apply and provide a more subtle shine. They are ideal for everyday maintenance and for keeping the leather supple and conditioned. Paste polishes, on the other hand, are more concentrated and provide a deeper, more reflective shine. They are best suited for achieving a mirror finish and for special occasions.
When choosing a leather polish, it’s important to select a color that matches the color of your belt. If you’re unsure, it’s always best to choose a polish that is slightly lighter than the leather. You can always apply multiple layers to achieve the desired color intensity. Avoid using polishes that are darker than the leather, as this can stain the leather and make it difficult to remove.
Proper Storage and Maintenance
Once you’ve achieved a mirror shine on your Sam Browne belt, it’s important to store it properly to maintain its condition. Store the belt in a cool, dry place away from direct sunlight and heat. Avoid storing the belt in a plastic bag, as this can trap moisture and lead to mold growth. Instead, store the belt in a breathable cloth bag or hang it on a hanger. Regularly clean and condition the belt to prevent it from drying out and cracking. With proper care and maintenance, your Sam Browne belt will last for many years to come.
Advanced Techniques for a Show-Stopping Shine
Beyond the basics, several advanced techniques can elevate your polishing game. One popular method involves using a heat gun or hair dryer to gently warm the leather before applying polish. The heat helps to open the pores of the leather, allowing the polish to penetrate more deeply. However, use caution and avoid overheating the leather, as this can cause it to dry out and crack. Another technique involves using a polishing wheel or rotary tool to buff the leather. This can significantly reduce the amount of time and effort required to achieve a mirror shine. However, it’s important to use a soft polishing wheel and to apply light pressure to avoid damaging the leather.
The Enduring Symbolism of a Polished Sam Browne Belt
Maintaining a Sam Browne belt is more than just a chore; it’s a commitment to excellence and a reflection of personal pride. A well-polished belt not only looks impressive but also serves as a symbol of respect and professionalism. By following the steps outlined in this guide, you can ensure that your Sam Browne belt always looks its best, reflecting the honor and tradition it represents. The effort you invest in polishing your belt is an investment in upholding the standards of your profession and demonstrating your dedication to quality.
