Stop the Drip: Your Ultimate Guide to Fixing a Leaky Sink
That persistent drip, drip, drip from a leaky sink can be more than just annoying. It wastes water, increases your water bill, and can eventually lead to more serious problems like mold and water damage. This comprehensive guide will walk you through diagnosing the cause of your leaky sink, providing step-by-step instructions for common repairs, and offering expert advice to ensure a long-lasting fix. We’ll equip you with the knowledge and confidence to tackle this common household problem, saving you money and preventing further damage. Whether you’re a seasoned DIYer or a complete beginner, this guide has something for you.
Understanding the Anatomy of a Leaky Sink
Before you grab your tools, it’s essential to understand the different parts of your sink and how they work together. This knowledge will help you pinpoint the source of the leak and choose the right repair strategy. A typical sink setup includes:
- Faucet: The fixture that controls the flow of water. It includes handles, a spout, and internal components like cartridges, ball valves, or compression stems.
- Supply Lines: Flexible tubes that connect the faucet to the hot and cold water shut-off valves.
- Shut-Off Valves: Valves located under the sink that allow you to turn off the water supply to the faucet.
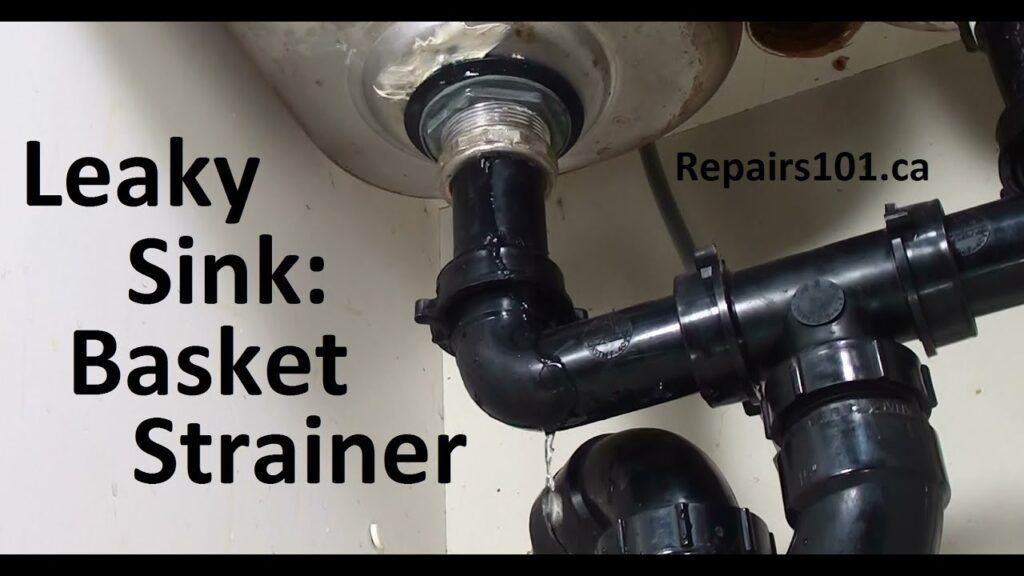
- Drain Assembly: The system of pipes and fittings that carries water away from the sink basin, including the strainer, tailpiece, P-trap, and drainpipe.
- P-Trap: The curved section of pipe under the sink that traps debris and prevents sewer gases from entering your home.
Each of these components is a potential source of leaks. Let’s explore the common causes.
Common Culprits Behind a Leaky Sink Faucet
A leaky faucet is often the first sign of trouble. Several factors can contribute to this problem:
- Worn-Out Washers: In compression faucets, washers create a seal to stop the flow of water. Over time, these washers can wear out, crack, or become brittle, leading to drips.
- Damaged O-Rings: O-rings are small, rubber rings that seal the faucet cartridge or ball valve. They can deteriorate over time, causing leaks around the handle or spout.
- Corroded Valve Seats: The valve seat is the part of the faucet body that the washer presses against. Corrosion or mineral buildup on the valve seat can prevent a tight seal, resulting in leaks.
- Loose Packing Nuts: The packing nut holds the stem assembly in place. If it’s loose, water can leak around the handle.
- Faulty Cartridge: Cartridge faucets use a cartridge to control water flow. A damaged or worn-out cartridge can cause leaks and reduced water pressure.
Pinpointing Leaks in Sink Drain Assemblies
If water is pooling under your sink, the drain assembly is likely to blame. Here are some common sources of drain leaks:
- Loose Connections: Connections between the various parts of the drain assembly can loosen over time due to vibrations or temperature changes.
- Worn-Out Washers and Seals: Washers and seals are used to create watertight connections between drain components. These can dry out, crack, or deteriorate, leading to leaks.
- Corroded Pipes: Corrosion can weaken the pipes, causing them to leak or even break.
- Cracked P-Trap: The P-trap is particularly vulnerable to damage from dropped objects or accidental impacts.
- Clogged Drain: A clogged drain can cause water to back up and leak from the strainer or overflow drain.
Essential Tools and Materials for Sink Repair
Before you start any repairs, gather the necessary tools and materials. Having everything on hand will make the job easier and prevent unnecessary trips to the hardware store. Here’s a basic checklist:
- Basin Wrench: For loosening and tightening nuts in tight spaces under the sink.
- Adjustable Wrench: For general-purpose tightening and loosening.
- Pliers: For gripping and manipulating small parts.
- Screwdrivers: Both Phillips-head and flat-head screwdrivers are essential.
- Plumber’s Putty: For sealing connections around the strainer and faucet base.
- Teflon Tape: For sealing threaded connections on pipes and fittings.
- New Washers and O-Rings: Have a variety of sizes on hand to replace worn-out parts.
- Replacement Parts: Depending on the type of faucet and the location of the leak, you may need to purchase replacement cartridges, valve seats, or other components.
- Bucket and Towels: To catch water and clean up spills.
- Safety Glasses: To protect your eyes from debris.
- Gloves: To protect your hands.
Step-by-Step Guide to Fixing a Leaky Faucet
Here’s a general guide to repairing common types of leaky faucets. Always turn off the water supply before starting any repairs.
Repairing a Compression Faucet
- Turn off the water supply: Locate the shut-off valves under the sink and turn them clockwise until they are completely closed.
- Remove the handle: Use a screwdriver to remove the screw holding the handle in place. You may need to pry off a decorative cap to access the screw.
- Remove the packing nut: Use an adjustable wrench to loosen and remove the packing nut.
- Remove the stem assembly: Pull the stem assembly straight up and out of the faucet body.
- Replace the washer: Remove the old washer from the bottom of the stem and replace it with a new one of the same size and type.
- Inspect the valve seat: Check the valve seat for corrosion or damage. If necessary, use a valve seat wrench to remove and replace it.
- Reassemble the faucet: Reassemble the faucet in the reverse order, tightening the packing nut securely but not overtightening.
- Turn on the water supply: Slowly turn on the shut-off valves and check for leaks.
Repairing a Cartridge Faucet
- Turn off the water supply: Locate the shut-off valves under the sink and turn them clockwise until they are completely closed.
- Remove the handle: Use a small Allen wrench or screwdriver to loosen the set screw holding the handle in place.
- Remove the retaining clip: Use pliers or a screwdriver to remove the retaining clip that holds the cartridge in place.
- Remove the cartridge: Pull the cartridge straight up and out of the faucet body. You may need to wiggle it gently to loosen it.
- Replace the cartridge: Insert the new cartridge into the faucet body, aligning it correctly.
- Reinstall the retaining clip: Reinstall the retaining clip to secure the cartridge in place.
- Reassemble the faucet: Reassemble the faucet in the reverse order, tightening the set screw securely.
- Turn on the water supply: Slowly turn on the shut-off valves and check for leaks.
Repairing a Ball Faucet
- Turn off the water supply: Locate the shut-off valves under the sink and turn them clockwise until they are completely closed.
- Loosen the set screw: Use an Allen wrench to loosen the set screw on the faucet handle.
- Remove the handle: Lift off the handle.
- Unscrew the cap: Unscrew the cap and collar.
- Loosen the ball: Loosen the ball with the special tool (often included in repair kits).
- Replace the O-rings and springs: Replace all O-rings and springs.
- Reassemble: Reassemble the faucet in reverse order.
- Turn on the water supply: Slowly turn on the shut-off valves and check for leaks.
Repairing a Ceramic Disc Faucet
- Turn off the water supply: Locate the shut-off valves under the sink and turn them clockwise until they are completely closed.
- Remove the handle: Depending on the model, you may need to loosen a set screw or pry off a cap to access the screw holding the handle in place.
- Remove the escutcheon cap: This may screw off or pop off.
- Remove the ceramic cylinder: Gently lift out the ceramic cylinder assembly.
- Inspect and clean: Inspect the cylinder and the valve body for any cracks or debris. Clean thoroughly.
- Replace seals (if needed): If you see any damaged seals, replace them.
- Reassemble: Reassemble the faucet in reverse order.
- Turn on the water supply: Slowly turn on the shut-off valves and check for leaks.
Addressing Leaks in the Sink Drain
Here’s how to fix common drain leaks:
Tightening Loose Connections
- Inspect the connections: Check all the connections between the drain components, including the strainer, tailpiece, P-trap, and drainpipe.
- Tighten the nuts: Use an adjustable wrench to tighten any loose nuts. Be careful not to overtighten, as this can damage the pipes.
- Test for leaks: Run water into the sink and check for leaks around the connections.
Replacing Washers and Seals
- Disassemble the drain: Disconnect the drain components to access the washers and seals.
- Remove the old washers and seals: Remove the old, worn-out washers and seals.
- Install new washers and seals: Install new washers and seals of the correct size and type.
- Reassemble the drain: Reconnect the drain components, tightening the nuts securely.
- Test for leaks: Run water into the sink and check for leaks around the connections.
Sealing with Plumber’s Putty
- Remove the strainer: Unscrew the nut holding the strainer in place and remove the strainer from the sink.
- Clean the area: Clean the area around the drain opening to remove any old putty or debris.
- Apply new putty: Roll a rope of plumber’s putty and press it around the underside of the strainer flange.
- Reinstall the strainer: Reinstall the strainer, pressing it firmly into the putty.
- Tighten the nut: Tighten the nut holding the strainer in place, squeezing out any excess putty.
- Remove excess putty: Remove any excess putty with a putty knife or your finger.
- Test for leaks: Run water into the sink and check for leaks around the strainer.
Preventing Future Leaks: Proactive Maintenance
Preventing leaks is always better than fixing them. Here are some tips for maintaining your sink and preventing future problems:
- Regularly inspect your sink: Check for leaks around the faucet, drain, and supply lines. Catching problems early can prevent them from becoming more serious.
- Tighten loose connections: Periodically tighten any loose nuts or connections on the drain assembly and faucet.
- Replace worn-out parts: Replace worn-out washers, O-rings, and seals as needed.
- Avoid harsh chemicals: Avoid using harsh chemicals or abrasive cleaners that can damage the pipes and fittings.
- Flush the drain regularly: Flush the drain with hot water to prevent clogs and buildup.
When to Call a Plumber: Knowing Your Limits
While many sink repairs are straightforward, some situations require the expertise of a licensed plumber. Consider calling a plumber if:
- You’re uncomfortable working with plumbing.
- You can’t identify the source of the leak.
- You’ve tried to fix the leak yourself, but it’s still dripping.
- The pipes are corroded or damaged.
- You suspect a more serious plumbing problem.
Advanced Leak Detection: Beyond the Obvious
Sometimes, a leak isn’t immediately obvious. A slow, hidden leak can cause significant damage over time. Here are some advanced techniques for detecting hidden leaks:
- Check your water meter: Turn off all water-using appliances and fixtures and check your water meter. If the meter is still running, you likely have a leak.
- Look for water stains: Check for water stains on the ceiling, walls, and floors around the sink.
- Smell for mold or mildew: A musty odor can indicate a hidden leak and mold growth.
The Environmental and Economic Impact of a Leaky Sink
A leaky sink might seem like a small problem, but it can have a significant impact on the environment and your wallet. A seemingly insignificant drip can waste gallons of water over time, contributing to water scarcity and increasing your water bill. By fixing your leaky sink, you’re not only saving money but also conserving a valuable resource.
Choosing the Right Faucet: A Long-Term Investment
If your faucet is old, corroded, or constantly leaking, it might be time to replace it. Choosing a high-quality, water-efficient faucet can save you money and reduce your environmental impact in the long run. Look for faucets with the WaterSense label, which indicates that they meet EPA criteria for water efficiency and performance. Brands like Delta, Moen and Kohler are known for durable and reliable faucets.
Expert Tips for a Leak-Free Sink
Based on our extensive experience, here are some additional tips to ensure a leak-free sink:
- Use high-quality replacement parts: Don’t skimp on replacement parts. Investing in high-quality washers, O-rings, and cartridges will ensure a longer-lasting repair.
- Apply Teflon tape correctly: When using Teflon tape, wrap it around the threads in a clockwise direction, overlapping each layer slightly.
- Don’t overtighten: Overtightening nuts and connections can damage the pipes and fittings. Tighten them snugly, but not excessively.
- Clean the area thoroughly: Before applying plumber’s putty or sealant, clean the area thoroughly to remove any dirt, grease, or debris.
Taking Control of Your Plumbing
Fixing a have a leaky sink might seem daunting at first, but with the right knowledge and tools, it’s a manageable DIY project. By understanding the components of your sink, identifying the source of the leak, and following our step-by-step instructions, you can stop the drip and prevent further damage. Remember to always turn off the water supply before starting any repairs and don’t hesitate to call a plumber if you’re unsure about anything. Share your experiences with fixing leaks in the comments below!
