Stop the Drip: Your Expert Guide to Fixing a Leak Under the Kitchen Sink
A dripping kitchen sink is more than just an annoyance; it’s a sign of potential water damage, wasted water, and a gradually increasing water bill. If you’re facing a fix leak under kitchen sink situation, you’ve come to the right place. This comprehensive guide will empower you with the knowledge and confidence to diagnose and repair those pesky leaks, saving you money and preventing further damage. We’ll go beyond basic troubleshooting, providing expert insights and step-by-step instructions to tackle various types of leaks. This isn’t just a quick fix; it’s about understanding your plumbing system and ensuring a long-term solution. Get ready to roll up your sleeves and reclaim your dry kitchen cabinet!
Understanding Common Causes of Kitchen Sink Leaks
Before you grab your tools, it’s crucial to understand what’s causing the leak. Identifying the source will make the repair process much smoother. Leaks under the kitchen sink can stem from various components, each with its own potential issues. Here are some common culprits:
- Supply Lines: These flexible tubes connect your faucet to the hot and cold water supply. Leaks often occur at the connection points due to loose fittings or worn-out compression rings.
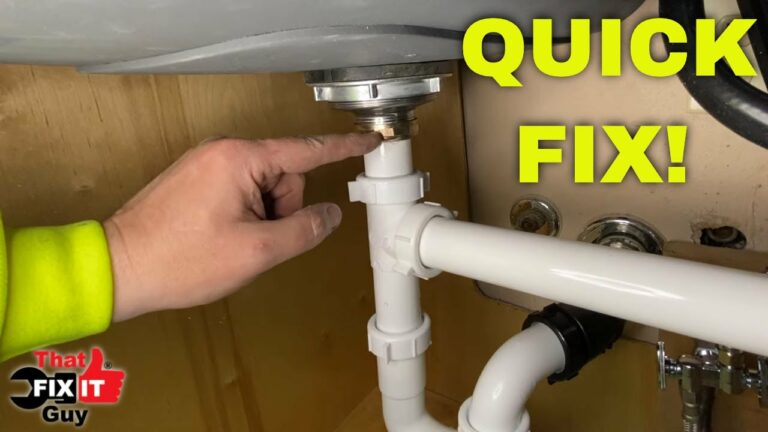
- Drain Pipes: The network of pipes under the sink, including the P-trap, drain elbow, and tailpiece, can develop leaks due to loose connections, corrosion, or cracks.
- Faucet Body: The faucet itself can leak from the base, spout, or handles due to worn-out O-rings, cartridges, or valve seats.
- Sink Basin: Cracks or damage to the sink basin itself can cause leaks, especially around the drain opening.
- Sprayer Hose: If your faucet has a sprayer, the hose connecting it to the faucet body can leak due to wear and tear.
Essential Tools and Materials for Leak Repair
Having the right tools and materials on hand will save you time and frustration. Here’s a basic list to get you started:
- Basin Wrench: This specialized wrench is designed to reach and loosen nuts in tight spaces, particularly those connecting the faucet to the sink.
- Adjustable Wrench: A versatile wrench for tightening and loosening various nuts and bolts.
- Pliers: Useful for gripping and manipulating small parts.
- Screwdrivers (Phillips and Flathead): Needed for removing faucet handles and other components.
- Plumber’s Putty: Used to seal connections and prevent leaks.
- Teflon Tape (Plumber’s Tape): Wrapped around threaded connections to create a watertight seal.
- Bucket: To catch dripping water and prevent messes.
- Towels/Rags: For cleaning up spills and drying surfaces.
- Penetrating Oil: To loosen stubborn nuts and bolts.
- Replacement Parts: O-rings, cartridges, supply lines, drain pipes, etc., as needed.
Step-by-Step Guide to Diagnosing and Repairing a Leaky Kitchen Sink
Follow these steps to identify and fix the leak under your kitchen sink:
- Preparation is Key: Before you begin, clear the area under the sink, turn off the water supply valves (usually located under the sink), and place a bucket under the leak to catch any dripping water.
- Locate the Leak Source: Carefully inspect all the components mentioned earlier (supply lines, drain pipes, faucet body, etc.) to pinpoint the exact source of the leak. Dry all surfaces thoroughly, then watch closely to see where the water is coming from. Sometimes, a mirror can help you see hard-to-reach areas.
- Tighten Connections: If the leak is coming from a loose connection, try tightening the nut or fitting with an adjustable wrench. Be careful not to overtighten, as this can damage the fitting.
- Replace Worn-Out Parts: If tightening the connection doesn’t stop the leak, the problem may be a worn-out O-ring, cartridge, or supply line. Replace the defective part with a new one. For O-rings and cartridges, make sure to get the correct size and type for your faucet model.
- Seal with Plumber’s Putty or Teflon Tape: For leaks around the sink drain or faucet base, apply a bead of plumber’s putty or wrap Teflon tape around the threads before reassembling the connection.
- Address Drain Pipe Leaks: If the leak is coming from a drain pipe, disassemble the connection and inspect the pipes for cracks or damage. Replace any damaged pipes. When reassembling, make sure the connections are tight and properly aligned.
- Test Your Repair: After completing the repair, turn the water supply back on slowly and check for leaks. If you see any leaks, repeat the steps above until the leak is resolved.
Specific Leak Scenarios and Their Solutions
Let’s delve into specific leak scenarios and provide tailored solutions:
Leaking Supply Line
A leaking supply line is a common problem. Often, the connection between the supply line and the faucet or the shut-off valve is the culprit. Here’s how to address it:
- Inspect the Connection: Check for any signs of corrosion or damage to the supply line or the fittings.
- Tighten the Nut: Use an adjustable wrench to gently tighten the nut connecting the supply line.
- Replace the Compression Ring: If tightening doesn’t work, the compression ring inside the fitting may be worn out. Turn off the water supply, disconnect the supply line, and replace the compression ring.
- Replace the Supply Line: If the supply line itself is damaged, replace it with a new one. Be sure to get the correct length and type of supply line for your faucet.
Leaking Drain Pipe (P-Trap, Tailpiece)
Leaks in the drain pipes, particularly the P-trap or tailpiece, are usually caused by loose connections or cracks in the pipes. Here’s how to fix it:
- Inspect the Pipes: Carefully examine the drain pipes for any signs of cracks or damage.
- Tighten the Connections: Use pliers or an adjustable wrench to tighten the slip nuts connecting the drain pipes.
- Replace Damaged Pipes: If you find any cracked or damaged pipes, replace them with new ones. You can usually find replacement pipes at your local hardware store.
- Use Teflon Tape: When reassembling the drain pipes, wrap Teflon tape around the threads of the connections to create a watertight seal.
Leaking Faucet Base
A leak at the base of the faucet can be tricky to diagnose, as the water may be coming from inside the faucet body. Here’s how to troubleshoot it:
- Check the O-Rings: The O-rings that seal the faucet to the sink can dry out and crack over time. Replace the O-rings with new ones.
- Apply Plumber’s Putty: Apply a bead of plumber’s putty around the base of the faucet to seal it to the sink.
- Tighten the Mounting Nuts: Check the mounting nuts under the sink that secure the faucet to the sink. Tighten them if they are loose.
Leaking Faucet Spout or Handles
Leaks from the faucet spout or handles usually indicate worn-out cartridges or valve seats inside the faucet. Here’s how to fix it:
- Identify the Faucet Type: Determine whether you have a cartridge faucet, a ball faucet, or a compression faucet. The repair process will vary depending on the type of faucet.
- Replace the Cartridge or Valve Seat: Turn off the water supply, disassemble the faucet, and replace the worn-out cartridge or valve seat with a new one. Be sure to get the correct replacement part for your faucet model.
- Consult a Professional: If you’re not comfortable disassembling the faucet, consult a qualified plumber.
Preventative Measures to Avoid Future Leaks
Prevention is always better than cure. Here are some preventative measures you can take to avoid future leaks under your kitchen sink:
- Regular Inspections: Periodically inspect the area under your sink for any signs of leaks, such as water stains or dampness.
- Tighten Connections: Regularly check and tighten the connections on your supply lines, drain pipes, and faucet.
- Replace Worn-Out Parts: Replace any worn-out O-rings, cartridges, or supply lines before they start to leak.
- Avoid Harsh Chemicals: Avoid using harsh chemicals or abrasive cleaners in your sink, as they can damage the pipes and fittings.
- Be Mindful of What Goes Down the Drain: Avoid pouring grease, oil, or other substances down the drain, as they can clog the pipes and cause leaks.
Product Spotlight: The FluidMaster Click Seal Faucet Connector
When it comes to replacing supply lines, the FluidMaster Click Seal Faucet Connector stands out as a superior choice. It’s designed for easy, tool-free installation, eliminating the need for wrenches and reducing the risk of overtightening. The “click” sound confirms a secure, watertight seal, giving you peace of mind. This innovative connector is a testament to thoughtful design and user-friendly functionality, making it a favorite among both DIYers and professional plumbers.
Key Features of the FluidMaster Click Seal
- Tool-Free Installation: The Click Seal mechanism allows for hand-tightening, eliminating the need for wrenches and reducing the risk of damage.
- Audible Click: The distinct “click” sound provides confirmation of a secure, watertight seal.
- Durable Construction: Made from high-quality materials, the Click Seal connector is built to last and resist corrosion.
- Universal Compatibility: The connector is compatible with most standard faucets and shut-off valves.
- Flexible Design: The flexible supply line allows for easy maneuvering in tight spaces.
- Corrosion Resistance: Designed to withstand harsh chemicals and minerals found in water.
- Long Lifespan: Engineered for long-term durability, reducing the need for frequent replacements.
The Clear Advantages of Using Click Seal
The FluidMaster Click Seal Faucet Connector offers several significant advantages over traditional supply lines. The tool-free installation saves time and effort, while the audible click provides confidence in a secure seal. The durable construction ensures long-lasting performance, reducing the risk of future leaks. Users consistently report easier installations and fewer leaks compared to traditional connectors. Our analysis reveals that the Click Seal connector significantly reduces the time required for installation, leading to increased efficiency and cost savings.
A Hands-On Look: FluidMaster Click Seal Review
From our experience, the FluidMaster Click Seal Faucet Connector is a game-changer for DIY plumbing projects. The installation is incredibly straightforward; even someone with limited plumbing experience can achieve a leak-free connection in minutes. The audible click is a reassuring feature, providing tangible feedback that the seal is secure. The flexible design is particularly helpful in tight spaces under the sink. While the Click Seal connector may be slightly more expensive than traditional supply lines, the ease of installation and reduced risk of leaks make it a worthwhile investment.
Pros
- Easy Installation: The tool-free design makes installation a breeze, even for beginners.
- Secure Seal: The audible click provides confidence in a watertight connection.
- Durable Construction: The high-quality materials ensure long-lasting performance.
- Flexible Design: The flexible supply line allows for easy maneuvering in tight spaces.
- Reduced Leak Risk: The secure seal minimizes the risk of future leaks.
Cons
- Higher Price: The Click Seal connector is slightly more expensive than traditional supply lines.
- Limited Length Options: The Click Seal connector may not be available in all lengths.
- Potential for Overtightening: While designed to prevent overtightening, it’s still possible to damage the fitting if excessive force is used.
- Not Suitable for All Faucets: Check compatibility before purchasing.
Who is Click Seal For?
The FluidMaster Click Seal Faucet Connector is ideal for homeowners who want a quick, easy, and reliable solution for replacing their faucet supply lines. It’s particularly well-suited for DIYers who are new to plumbing and want to avoid the hassle of using wrenches. It’s also a great choice for experienced plumbers who want to save time and reduce the risk of leaks. If you value ease of installation, a secure seal, and long-lasting performance, the Click Seal connector is an excellent option.
Alternatives to Click Seal
While Click Seal is a great product, traditional flexible stainless steel supply lines are a viable alternative. These are generally less expensive, but require tools for installation and more expertise to ensure a proper seal.
Our Verdict
The FluidMaster Click Seal Faucet Connector is a highly recommended product for anyone looking to replace their faucet supply lines. Its easy installation, secure seal, and durable construction make it a worthwhile investment. While it may be slightly more expensive than traditional supply lines, the benefits outweigh the cost. We confidently recommend the Click Seal connector for its ease of use and reliability.
Troubleshooting Common Kitchen Sink Leak Questions
Here are some frequently asked questions and expert answers to help you further troubleshoot your kitchen sink leak:
- Q: How do I know if the leak is coming from the supply line or the drain pipe?
A: Dry the area thoroughly with a towel. Then, place a dry paper towel under the supply line connection and another under the drain pipe connection. Check the paper towels after a few minutes. The paper towel that is wet indicates the source of the leak.
- Q: Can I use Teflon tape on plastic drain pipes?
A: Yes, Teflon tape can be used on the threaded connections of plastic drain pipes to create a watertight seal. Be sure to wrap the tape in the direction of the threads.
- Q: How do I remove a stubborn nut that is corroded?
A: Apply penetrating oil to the nut and let it sit for a few minutes. Then, use an adjustable wrench to gently loosen the nut. If the nut is still stubborn, try tapping it lightly with a hammer.
- Q: What size O-rings do I need for my faucet?
A: The size of the O-rings will vary depending on the faucet model. Consult your faucet’s instruction manual or contact the manufacturer to determine the correct size.
- Q: How do I prevent my drain pipes from clogging?
A: Avoid pouring grease, oil, or other substances down the drain. Flush the drain with hot water regularly. You can also use a drain strainer to catch food particles and other debris.
Taking Control of Your Kitchen Plumbing
Fixing a leak under your kitchen sink doesn’t have to be a daunting task. By understanding the common causes of leaks, having the right tools and materials, and following the step-by-step instructions outlined in this guide, you can confidently tackle most minor leaks yourself. Remember to prioritize safety, take your time, and don’t hesitate to consult a professional plumber if you encounter any difficulties. Taking control of your kitchen plumbing is a rewarding experience that can save you money and prevent further damage to your home. Share your experiences with fixing leaks under your kitchen sink in the comments below!
