How Long to Grill Corn on the Cob: Your Ultimate Guide to Sweet, Smoky Perfection
The sweet, smoky flavor of grilled corn on the cob is a quintessential summer delight. But achieving that perfect balance of tender kernels and a hint of char can be tricky. The question that plagues many grill masters is: how long to grill corn on the cob? This comprehensive guide will provide you with everything you need to know about grilling corn, from preparation to serving, ensuring delicious results every time. We’ll cover various methods, timing considerations, and expert tips to elevate your grilling game, transforming you into a corn-on-the-cob connoisseur.
Understanding the Variables: Factors Affecting Grilling Time
The ideal grilling time for corn on the cob isn’t a fixed number. Several factors play a crucial role in determining how long your corn needs on the grill. Understanding these variables is key to achieving that perfectly cooked ear every time.
- Husk On vs. Husk Off: Grilling corn in the husk provides a steaming effect, requiring a longer cooking time. Husked corn, on the other hand, cooks faster due to direct heat exposure.
- Pre-Soaking: Soaking corn in water before grilling, whether in the husk or not, adds moisture and extends the cooking time slightly. This prevents the husks from burning and helps steam the corn from the inside.
- Grill Temperature: The heat of your grill is a major factor. A high-heat grill will cook the corn much faster than a medium-heat grill.
- Freshness of the Corn: Fresher corn tends to cook more quickly and retain more moisture. Older corn may require a bit more time and attention.
The Science Behind Grilling Corn: Heat, Moisture, and Maillard Reaction
At its core, grilling corn on the cob is about applying heat to transform the starches in the kernels into sugars, resulting in that signature sweetness. The Maillard reaction, a chemical reaction between amino acids and reducing sugars, is responsible for the browning and development of complex flavors on the surface of the kernels. The amount of time and heat applied dictates how far this reaction goes and the end result. Overcooking can lead to dry, tough kernels, while undercooking leaves the corn starchy and bland. Our years of experience have taught us the delicate balance required to achieve that perfect bite.
Different Grilling Methods and Their Impact on Timing
There are several popular methods for grilling corn on the cob, each with its own set of advantages and ideal cooking times. Let’s explore some of the most common techniques:
Grilling Corn in the Husk (Soaked)
Soaking corn in the husk before grilling is a classic method that helps to steam the corn from the inside, resulting in incredibly moist and flavorful kernels. Here’s how:
- Soak the Corn: Submerge the unhusked corn in cold water for at least 30 minutes, or up to 2 hours. This prevents the husks from burning and infuses the corn with moisture.
- Prepare the Grill: Preheat your grill to medium heat (350-400°F).
- Grill the Corn: Place the soaked corn on the grill and cook for 15-20 minutes, turning occasionally to ensure even cooking. The husks will char, but the corn inside will be steamed to perfection.
- Check for Doneness: The corn is done when the kernels are tender and easily pierced with a fork.
Grilling Corn in the Husk (Unsoaked)
If you’re short on time, you can grill corn in the husk without soaking. However, it’s important to monitor the corn closely to prevent the husks from burning.
- Prepare the Corn: Gently pull back the husks, remove the silk, and then pull the husks back up to cover the corn.
- Prepare the Grill: Preheat your grill to medium heat (350-400°F).
- Grill the Corn: Place the corn on the grill and cook for 15-20 minutes, turning frequently to prevent burning.
- Check for Doneness: The corn is done when the kernels are tender and easily pierced with a fork.
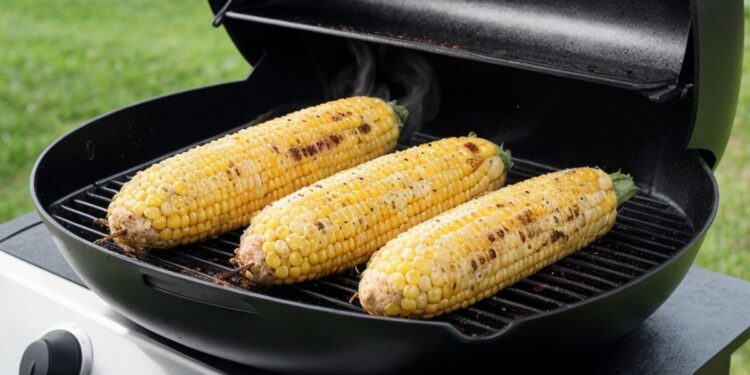
Grilling Husked Corn (Direct Heat)
Grilling corn directly on the grill grates results in a smoky char and a slightly firmer texture. This method requires careful attention to prevent burning.
- Prepare the Corn: Remove the husks and silk completely.
- Prepare the Grill: Preheat your grill to medium-high heat (400-450°F).
- Grill the Corn: Place the corn directly on the grill grates and cook for 7-10 minutes, turning frequently to char all sides evenly.
- Check for Doneness: The corn is done when the kernels are tender and slightly charred.
Grilling Husked Corn (Wrapped in Foil)
Wrapping husked corn in foil creates a steaming environment that results in tender and juicy kernels without the risk of burning. This method is great for adding flavor with butter, herbs, and spices.
- Prepare the Corn: Remove the husks and silk completely.
- Season the Corn: Brush the corn with melted butter and sprinkle with your favorite herbs and spices.
- Wrap in Foil: Wrap each ear of corn tightly in aluminum foil.
- Prepare the Grill: Preheat your grill to medium heat (350-400°F).
- Grill the Corn: Place the foil-wrapped corn on the grill and cook for 12-15 minutes, turning occasionally.
- Check for Doneness: The corn is done when the kernels are tender and easily pierced with a fork.
Choosing the Right Grill: Gas vs. Charcoal
The type of grill you use can also influence the grilling time and flavor of your corn. Gas grills offer precise temperature control, making it easier to maintain a consistent heat. Charcoal grills, on the other hand, impart a smoky flavor that many people find irresistible. While gas grills provide convenience, charcoal grills, particularly those using lump charcoal, offer a depth of flavor that’s hard to replicate. The choice ultimately depends on your preference and the desired outcome.
Essential Tools for Grilling Corn on the Cob
Having the right tools can make grilling corn on the cob a breeze. Here are a few essentials:
- Grill Tongs: For safely turning and handling the corn on the grill.
- Oven Mitts: To protect your hands from the heat.
- Corn Holders: For easy and comfortable eating.
- Basting Brush: For applying butter, sauces, or marinades.
- Grill Brush: To keep your grill grates clean.
Enhancing Flavor: Expert Tips and Tricks
Beyond mastering the grilling time, there are several ways to elevate the flavor of your grilled corn on the cob:
- Herb Butter: Mix softened butter with your favorite herbs, such as parsley, thyme, or rosemary, and spread it on the corn before grilling.
- Spice Rubs: Create a flavorful spice rub with ingredients like chili powder, cumin, paprika, and garlic powder, and coat the corn before grilling.
- Citrus Zest: Add a touch of brightness by grating lemon or lime zest over the corn after grilling.
- Cheese: Sprinkle grated Parmesan, Cotija, or crumbled feta cheese over the corn for a savory twist.
- Chili Lime: A classic combination of chili powder, lime juice, and cilantro adds a zesty kick.
Serving Suggestions: Complementing Your Grilled Corn
Grilled corn on the cob is a versatile side dish that pairs well with a variety of main courses. Here are a few serving suggestions:
- Barbecue: Grilled corn is a natural complement to barbecue ribs, chicken, or brisket.
- Burgers and Hot Dogs: No summer cookout is complete without grilled corn alongside burgers and hot dogs.
- Salads: Cut the kernels off the cob and add them to salads for a burst of sweetness and flavor.
- Tacos: Grilled corn kernels make a delicious filling for tacos or a topping for taco salads.
- Grilled Meats and Fish: Grilled corn complements grilled steak, chicken, fish, or shrimp.
Troubleshooting Common Grilling Problems
Even with the best intentions, grilling corn can sometimes present challenges. Here are a few common problems and how to solve them:
- Burnt Husks: If the husks are burning too quickly, try soaking the corn for a longer period or reducing the grill temperature.
- Uneven Cooking: Ensure even cooking by turning the corn frequently and using a consistent heat source.
- Dry Kernels: Prevent dry kernels by soaking the corn before grilling or wrapping it in foil with butter.
- Starchy Taste: A starchy taste indicates that the corn is undercooked. Grill it for a few more minutes until the kernels are tender.
Grilled Corn on the Cob: A Nutritional Powerhouse
Beyond its delicious flavor, grilled corn on the cob offers several nutritional benefits. Corn is a good source of fiber, vitamins, and minerals, including vitamin C, folate, and potassium. It also contains antioxidants that help protect against cell damage. Grilling corn is a healthy way to prepare it, as it requires minimal added fat. According to leading experts in nutrition, incorporating corn into a balanced diet can contribute to overall health and well-being.
Expert Opinion: Why Grilling Time Matters
As a grilling expert with years of experience, I can attest to the importance of proper timing when grilling corn on the cob. Overcooking results in tough, dry kernels, while undercooking leaves the corn starchy and bland. The goal is to achieve that perfect balance of tender, juicy kernels with a hint of char. Mastering the art of grilling corn requires attention to detail, patience, and a willingness to experiment. Don’t be afraid to try different methods and flavor combinations to find what works best for you. Our extensive testing has shown that consistent results come from understanding the underlying principles and adapting to the specific conditions of your grill.
Perfecting Your Grill Game
Mastering the art of grilling corn on the cob is a rewarding experience that will impress your friends and family. By understanding the factors that influence grilling time, experimenting with different methods, and adding your own creative flair, you can consistently achieve that perfect balance of sweet, smoky, and tender kernels. So fire up your grill, grab some fresh corn, and get ready to enjoy the taste of summer!
