Minecraft Using Too Much RAM? Expert Solutions to Optimize Performance
Is your Minecraft game lagging, stuttering, or crashing? One of the most common culprits is excessive RAM usage. Minecraft, while seemingly simple, can be surprisingly demanding on your system’s memory, especially with mods, resource packs, or playing on large servers. This comprehensive guide will provide you with expert solutions to diagnose and fix the “Minecraft using too much RAM” issue, ensuring a smoother, more enjoyable gaming experience. We’ll delve into the technical aspects, explore practical troubleshooting steps, and offer insights to optimize your Minecraft setup for peak performance.
Understanding Minecraft’s RAM Requirements
To effectively tackle the problem of Minecraft consuming excessive RAM, it’s crucial to understand the game’s memory management and how it interacts with your system. Minecraft, being a Java-based application, relies on the Java Virtual Machine (JVM) to run. The JVM allocates a certain amount of RAM to the game, which is used to store game data, textures, models, and other assets. If this allocated RAM is insufficient, Minecraft will struggle, leading to performance issues.
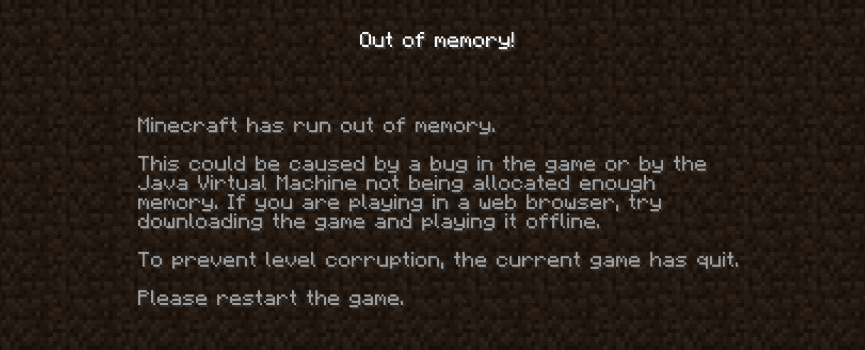
The default RAM allocation for Minecraft is often inadequate, particularly for modded gameplay or high-resolution resource packs. When Minecraft runs out of allocated RAM, it starts using your computer’s hard drive as virtual memory, which is significantly slower and results in lag and stuttering. Moreover, memory leaks within Minecraft or its mods can exacerbate the problem, causing RAM usage to steadily increase over time.
Factors Influencing RAM Usage
Several factors contribute to Minecraft’s RAM consumption:
- Game Version: Newer versions of Minecraft, with their enhanced features and graphical fidelity, generally require more RAM.
- Mods: Mods significantly increase RAM usage by adding new content, mechanics, and textures. The more mods you have installed, the more RAM Minecraft will need.
- Resource Packs: High-resolution resource packs, which enhance the game’s visuals, consume a substantial amount of RAM.
- Render Distance: A higher render distance allows you to see farther into the game world, but it also requires more RAM to load and display those distant chunks.
- Server Load: Playing on a heavily populated server can increase RAM usage due to the increased amount of data being processed.
- JVM Arguments: Incorrect or suboptimal JVM arguments can lead to inefficient memory management and increased RAM consumption.
Allocating More RAM to Minecraft: A Step-by-Step Guide
The most common solution to the “Minecraft using too much RAM” issue is to manually allocate more RAM to the game. This allows Minecraft to store more data in memory, reducing the need to access the slower hard drive and improving performance. Here’s how to allocate more RAM using the official Minecraft Launcher:
- Open the Minecraft Launcher: Launch the official Minecraft Launcher on your computer.
- Navigate to Installations: Click on the “Installations” tab at the top of the launcher.
- Select Your Profile: Hover over the Minecraft profile you want to modify (usually the latest release or a specific modpack) and click the three dots, then select “Edit.”
- Access More Options: Click on “More Options” at the bottom of the edit screen.
- Modify JVM Arguments: Locate the “JVM Arguments” text box. This box contains a string of code that controls how Java runs Minecraft.
- Adjust the -Xmx Value: The
-Xmxparameter specifies the maximum amount of RAM that Minecraft can use. The default value is usually-Xmx2G, which means 2 gigabytes of RAM. Change this value to a higher amount, such as-Xmx4Gfor 4 gigabytes, or-Xmx6Gfor 6 gigabytes. Important: Do not allocate more RAM than your system has available. Allocating too much RAM can lead to system instability. - Save Your Changes: Click “Save” to apply the changes to your profile.
- Launch Minecraft: Launch Minecraft using the modified profile. You should now have more RAM allocated to the game.
Important Considerations:
- System RAM: Ensure your computer has enough physical RAM to support the increased allocation. A minimum of 8GB of RAM is recommended for modded Minecraft, and 16GB or more is ideal.
- Operating System: If you’re using a 32-bit operating system, it can only address a maximum of 4GB of RAM. To allocate more than 4GB to Minecraft, you’ll need to upgrade to a 64-bit operating system.
- Testing: After allocating more RAM, monitor your game’s performance. If you still experience lag, try increasing the allocation further, but be mindful of your system’s limitations.
Alternative Launchers: CurseForge and GDLauncher
While the official Minecraft Launcher is sufficient for allocating RAM, alternative launchers like CurseForge and GDLauncher offer more advanced features and streamlined mod management. These launchers often provide built-in RAM allocation settings, making it easier to adjust the amount of RAM allocated to Minecraft.
CurseForge
CurseForge is a popular launcher for managing modpacks and allocating RAM. To allocate RAM using CurseForge:
- Open CurseForge: Launch the CurseForge application.
- Navigate to Minecraft: Select the Minecraft icon.
- Select Profile/Modpack: Choose the profile or modpack you want to adjust.
- Settings: Click the settings icon for the profile.
- Java Settings: Find the section for Java Settings or RAM allocation.
- Allocate RAM: Adjust the slider or enter the desired amount of RAM in MB or GB.
- Launch: Launch the game.
GDLauncher
GDLauncher is another excellent option for managing Minecraft instances and allocating RAM. To allocate RAM using GDLauncher:
- Open GDLauncher: Launch the GDLauncher application.
- Select Instance: Choose the Minecraft instance you want to adjust.
- Edit Instance: Click the “Edit Instance” button.
- Settings: Navigate to the “Settings” tab.
- Java Settings: Find the section for Java Settings or RAM allocation.
- Allocate RAM: Adjust the slider or enter the desired amount of RAM in MB or GB.
- Save: Save the changes and launch the game.
Optimizing Minecraft Settings for Reduced RAM Usage
In addition to allocating more RAM, you can also optimize Minecraft’s settings to reduce its overall RAM footprint. This can be particularly helpful if you’re running on a system with limited resources.
Graphics Settings
- Render Distance: Reduce the render distance to the lowest acceptable level. A lower render distance means fewer chunks need to be loaded into memory.
- Graphics Quality: Set the graphics quality to “Fast” instead of “Fancy.” This disables some of the more demanding graphical effects.
- Particles: Reduce the number of particles displayed. Particles can consume a significant amount of RAM, especially during explosions or other particle-heavy events.
- Smooth Lighting: Disable smooth lighting. While it enhances the game’s visuals, it also increases RAM usage.
- Clouds: Turn clouds off or set them to “Fast.”
Performance Settings
- Chunk Updates: Reduce the chunk updates setting. This controls how frequently Minecraft updates the displayed chunks. A lower value can reduce RAM usage, but it may also result in slightly slower chunk loading.
- Smooth FPS: Enable smooth FPS. This can help stabilize the frame rate and reduce stuttering, even if it doesn’t directly reduce RAM usage.
- View Bobbing: Disable view bobbing. This is a minor graphical effect that can be disabled without significantly impacting the game’s visuals.
Mod-Specific Optimizations
If you’re playing with mods, some mods may have their own configuration options that can help reduce RAM usage. Consult the mod’s documentation or configuration file for specific optimization tips. For example, some mods allow you to disable certain features or reduce the quality of textures.
Identifying and Removing Problematic Mods
Mods are a fantastic way to enhance Minecraft, but they can also be a major source of RAM issues. Some mods are poorly optimized or contain memory leaks, causing RAM usage to steadily increase over time. Identifying and removing these problematic mods can significantly improve your game’s performance.
Identifying Problematic Mods
There are several ways to identify mods that are contributing to high RAM usage:
- Task Manager: Monitor Minecraft’s RAM usage in the Task Manager. If you notice a sudden spike in RAM usage after installing a particular mod, that mod may be the culprit.
- Mod Profilers: Use a mod profiler, such as the VanillaFix mod, to identify mods that are consuming the most RAM. These profilers provide detailed information about each mod’s memory usage.
- Testing: Disable mods one by one and test the game’s performance. If you notice a significant improvement after disabling a particular mod, that mod is likely the source of the problem.
Removing Problematic Mods
Once you’ve identified a problematic mod, remove it from your Minecraft installation. This can usually be done by deleting the mod’s file from the “mods” folder in your Minecraft directory.
Note: Before removing a mod, back up your world. Removing a mod can sometimes cause compatibility issues or data loss.
Regularly Restarting Minecraft
Even with optimized settings and well-behaved mods, Minecraft can still accumulate memory leaks over time. Regularly restarting Minecraft can help clear these memory leaks and prevent RAM usage from spiraling out of control. A good practice is to restart Minecraft every few hours, or whenever you notice a significant performance drop.
Updating Java
Minecraft relies on Java to run, so it’s essential to keep your Java installation up to date. Newer versions of Java often include performance improvements and bug fixes that can help reduce RAM usage and improve overall stability. You can download the latest version of Java from the official Oracle website.
When is it Time to Upgrade Your Hardware?
If you’ve tried all of the software-based solutions and are still struggling with excessive RAM usage, it may be time to consider upgrading your hardware. The two most important hardware components for Minecraft performance are the CPU and RAM.
- RAM: Upgrading to more RAM can significantly improve Minecraft’s performance, especially if you’re playing with mods or high-resolution resource packs. A minimum of 8GB of RAM is recommended, and 16GB or more is ideal.
- CPU: A faster CPU can help Minecraft process data more efficiently, reducing RAM usage and improving overall performance. Look for a CPU with a high clock speed and multiple cores.
Why Understanding RAM Usage is Key to Minecraft Enjoyment
In conclusion, understanding and addressing the issue of “Minecraft using too much RAM” is crucial for ensuring a smooth and enjoyable gaming experience. By allocating sufficient RAM, optimizing your settings, identifying problematic mods, and keeping your system up to date, you can significantly improve Minecraft’s performance and prevent lag, stuttering, and crashes. Remember to monitor your game’s RAM usage and adjust your settings as needed to find the optimal balance between performance and visual quality.
Have you experienced Minecraft using too much RAM? Share your troubleshooting tips and experiences in the comments below. Your insights can help other players optimize their Minecraft setups and enjoy a better gaming experience.
