Mastering Mod Organizer 2 for Oblivion: A Comprehensive Guide
For the dedicated Elder Scrolls IV: Oblivion enthusiast, the pursuit of the ultimate modded experience is a never-ending quest. Achieving a stable, customized game hinges on one crucial tool: Mod Organizer 2 (MO2). This guide provides an in-depth exploration of using MO2 with Oblivion, covering everything from initial setup to advanced techniques for managing complex mod lists. Whether you’re a seasoned modder or just starting, this resource will empower you to create the Oblivion of your dreams, ensuring a stable and enjoyable gameplay experience. We’ll delve into best practices, troubleshoot common issues, and offer expert insights to elevate your modding skills. This comprehensive guide will make you a master of mo2 mod obliviion.
Understanding Mod Organizer 2 and its Importance for Oblivion
Mod Organizer 2 is not just another mod manager; it’s a virtual file system that isolates mods from your core Oblivion installation. Unlike traditional mod managers that directly modify the game’s data folder, MO2 creates a virtual environment where mods are installed and managed separately. This approach offers several key advantages:
- Clean Game Directory: Your Oblivion installation remains untouched, preventing irreversible changes and simplifying troubleshooting.
- Easy Mod Management: Quickly enable, disable, and reorder mods without affecting other mods or the base game.
- Conflict Resolution: MO2 makes it easier to identify and resolve conflicts between mods.
- Profiles: Create multiple modding profiles, each with its own unique set of enabled mods. This allows you to experiment with different mod combinations without affecting your main game.
- Enhanced Stability: By isolating mods, MO2 reduces the risk of game crashes and other stability issues.
The importance of MO2 for Oblivion modding cannot be overstated. Oblivion is notorious for its instability, especially when heavily modded. MO2’s virtual file system significantly reduces the risk of conflicts and ensures a more stable and enjoyable experience. It’s the cornerstone of any serious Oblivion modding setup.
Setting Up Mod Organizer 2 for Oblivion: A Step-by-Step Guide
Before diving into the world of Oblivion mods, you need to set up Mod Organizer 2 correctly. Follow these steps to ensure a smooth installation:
- Download Mod Organizer 2: Get the latest version from the official MO2 website or GitHub repository.
- Install MO2: Run the installer and choose a location outside of your Oblivion installation folder (e.g.,
C:ModdingMO2). This is crucial for maintaining a clean game directory. - Run MO2: Launch Mod Organizer 2. The first time you run it, MO2 will ask you to manage an existing game or create a new instance. Select “Create a new instance.”
- Choose Oblivion: Select Oblivion from the list of supported games.
- Instance Type: Choose “Portable instance.” This keeps all MO2 data (mods, profiles, etc.) within the MO2 installation folder, making it self-contained.
- Name the Instance: Give your instance a descriptive name (e.g., “Oblivion Modding”).
- Configure Executables: MO2 needs to know where your Oblivion executables are located. Go to Settings (the gear icon), then Paths. Ensure the paths for Oblivion.exe, OblivionLauncher.exe, and other relevant executables are correctly set.
- Install Required Tools: Install essential tools like LOOT (Load Order Optimization Tool) and xEdit (TES4Edit) through MO2. These tools are crucial for managing your mod load order and resolving conflicts. To do this, click the executables button (looks like gears) and add them as executables. Browse to their .exe files.
With these steps completed, Mod Organizer 2 is ready to manage your Oblivion mods. Remember to always launch Oblivion through MO2 to ensure that your mods are loaded correctly.
Essential Tools for Modding Oblivion with MO2
While Mod Organizer 2 is the foundation of your modding setup, several other tools are essential for a smooth and successful experience. These tools help you manage your load order, resolve conflicts, and create compatibility patches.
LOOT (Load Order Optimization Tool)
LOOT automatically sorts your mod load order based on a masterlist of known mod dependencies and conflicts. This helps prevent many common issues caused by incorrect load orders. To use LOOT with MO2, add it as an executable in MO2’s settings and run it through MO2. Always run LOOT after installing or changing mods to ensure your load order is optimized.
xEdit (TES4Edit)
xEdit is a powerful tool for examining and editing game data. It allows you to identify conflicts between mods, create compatibility patches, and even make your own custom tweaks to the game. While xEdit has a steep learning curve, it’s an invaluable tool for advanced modding. Run it through MO2 to ensure it has access to your virtual file system.
Wrye Bash
Wrye Bash is another powerful tool that can create a Bashed Patch. The Bashed Patch merges leveled lists from multiple mods, ensuring that items from different mods appear in the game world. It also handles other compatibility issues and is a valuable tool for any serious Oblivion modder. Run it through MO2 for proper mod access.
Installing and Managing Mods with Mod Organizer 2
Installing mods with MO2 is a straightforward process:
- Download the Mod: Obtain the mod you want to install from a reputable source like Nexus Mods.
- Add the Mod to MO2: There are two ways to add a mod to MO2:
- Manual Installation: Click the “Install a new mod from an archive” button (the icon that looks like a CD). Browse to the downloaded mod archive and select it. MO2 will then prompt you to configure the mod.
- Drag and Drop: Simply drag and drop the downloaded mod archive into the MO2 window. MO2 will automatically recognize and install the mod.
- Configure the Mod: After adding the mod, MO2 will display its contents. Ensure that the data folder is correctly identified. If the mod includes an esp or esm file, make sure it’s enabled in the right-hand pane.
- Activate the Mod: Check the box next to the mod’s name in the left-hand pane to enable it.
- Run LOOT: After installing new mods, run LOOT to optimize your load order.
Managing mods in MO2 is equally simple. You can enable, disable, and reorder mods by checking or unchecking the boxes next to their names. The order in which mods appear in the left-hand pane determines their load order. Drag and drop mods to change their order. Remember to run LOOT after making any changes to your mod list.
Troubleshooting Common Issues with MO2 and Oblivion
Even with careful planning, you may encounter issues when modding Oblivion with MO2. Here are some common problems and their solutions:
- Game Crashes: Game crashes are often caused by mod conflicts or an incorrect load order. Run LOOT to optimize your load order. If crashes persist, disable mods one by one to identify the culprit.
- Missing Textures or Meshes: This usually indicates that a mod is not installed correctly or that its files are not being loaded properly. Ensure that the mod’s data folder is correctly configured in MO2 and that the mod is enabled.
- Script Errors: Script errors can cause a variety of issues, from minor glitches to game-breaking bugs. Check the mod’s documentation for known issues and solutions. If necessary, disable the mod or try a different version.
- Load Order Issues: Incorrect load orders can cause a wide range of problems, from missing content to game crashes. Always run LOOT to optimize your load order. If LOOT doesn’t solve the problem, you may need to manually adjust the load order based on mod dependencies.
- MO2 Not Recognizing Oblivion: Make sure that the paths to your Oblivion executables are correctly set in MO2’s settings. Also, ensure that you’re running MO2 as an administrator.
Advanced Techniques for Optimizing Your Modded Oblivion Experience
Once you’ve mastered the basics of MO2 and Oblivion modding, you can explore advanced techniques to further optimize your experience:
Creating Compatibility Patches
When using multiple mods that modify the same game data, conflicts are inevitable. Creating compatibility patches resolves these conflicts by merging the changes from different mods into a single file. xEdit is the tool of choice for creating compatibility patches.
Using ENBSeries for Visual Enhancements
ENBSeries is a popular graphics modification that can significantly enhance the visual fidelity of Oblivion. While ENBSeries is not directly managed by MO2, it can be used in conjunction with MO2. Install ENBSeries manually by copying its files into your Oblivion installation folder. Then, configure MO2 to launch Oblivion with ENBSeries enabled.
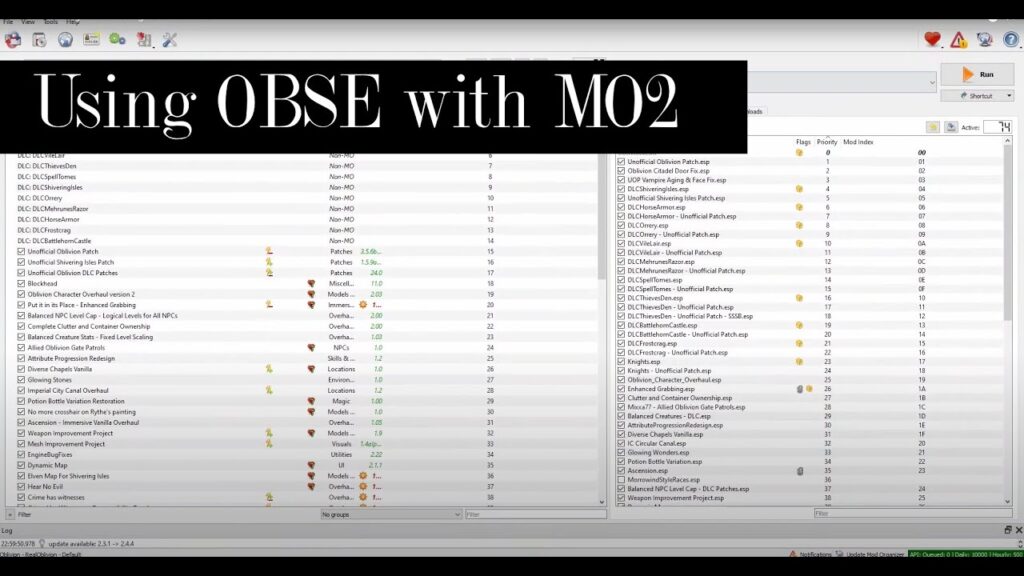
Modding Tools and Script Extenders
OBSE (Oblivion Script Extender) extends the scripting capabilities of Oblivion, allowing modders to create more complex and immersive mods. Install OBSE manually by copying its files into your Oblivion installation folder. Then, configure MO2 to launch Oblivion through the OBSE launcher.
The Undisputed King of Oblivion Modding
Mod Organizer 2 is an indispensable tool for anyone serious about modding Oblivion. Its virtual file system, powerful mod management features, and compatibility with essential tools make it the best choice for achieving a stable and customized gaming experience. While modding Oblivion can be challenging, MO2 significantly simplifies the process and empowers you to create the Oblivion of your dreams. Take the time to learn its features and master its techniques, and you’ll be rewarded with a truly unique and personalized gaming experience. Share your favorite Oblivion mods and MO2 tips in the comments below!
