How to Fix a Leaky Hose at the Bottom of Your Kitchen Tap: A Comprehensive Guide
Is your kitchen sink plagued by a persistent drip, drip, drip emanating from the base of your tap? A leaky hose connection at the bottom of your kitchen tap is a common problem, often leading to wasted water, increased water bills, and potential damage to your cabinetry. You might be tempted to call a plumber immediately, but with the right knowledge and tools, you can often fix this issue yourself. This comprehensive guide will provide you with everything you need to know about how yo fix hose yo bottom of kitchen tap, saving you time, money, and the hassle of waiting for a professional. We’ll walk you through the process step-by-step, from identifying the cause of the leak to making the necessary repairs. Our goal is to equip you with the expertise and confidence to tackle this common plumbing problem effectively.
Understanding the Anatomy of Your Kitchen Tap and Hose Connections
Before diving into the repair process, it’s crucial to understand the components involved. Kitchen taps typically consist of a faucet body, a spout, handles (or a single lever) for controlling water flow, and flexible supply hoses that connect the tap to the water supply pipes under the sink. These hoses are usually connected to the tap using threaded fittings and to the water supply pipes via compression fittings or threaded connections. The area where the hose connects to the tap body is a frequent source of leaks. This is often due to wear and tear on the O-rings or compression washers that create a watertight seal. Sometimes, the hose itself may develop a crack or puncture, leading to a leak.
According to a 2024 report by the Environmental Protection Agency (EPA), household leaks can waste significant amounts of water annually. Addressing even small leaks promptly can contribute to water conservation efforts and reduce your environmental footprint.
Identifying the Cause of the Leak: A Crucial First Step
Pinpointing the exact source of the leak is essential for a successful repair. Here’s how to diagnose the problem:
- Visual Inspection: Carefully examine the area where the hose connects to the tap body. Look for any signs of water dripping, pooling, or mineral buildup.
- Dry and Observe: Dry the area thoroughly with a clean cloth or paper towel. Then, turn on the tap and observe closely to see exactly where the water is escaping.
- Check the Connections: Gently wiggle the hose and the fittings to see if this exacerbates the leak. If so, the connection may be loose or the fittings may be damaged.
- Inspect the Hose: Run your fingers along the length of the hose, feeling for any bulges, cracks, or soft spots.
Common causes of leaks at the bottom of the kitchen tap hose include:
- Loose Connections: Fittings may have loosened over time due to vibrations or temperature changes.
- Worn O-rings or Washers: These rubber or plastic seals can degrade over time, losing their ability to create a watertight seal.
- Damaged Hose: The hose itself may have developed a crack, puncture, or bulge.
- Corrosion: Mineral buildup or corrosion can damage the fittings or the hose, leading to leaks.
Essential Tools and Materials for Fixing a Leaky Kitchen Tap Hose
Before you begin the repair, gather the necessary tools and materials. Having everything on hand will make the process smoother and more efficient.
- Adjustable Wrench: For tightening and loosening fittings.
- Basin Wrench (Optional): Useful for accessing hard-to-reach fittings under the sink.
- Screwdrivers (Phillips and Flathead): Depending on the type of tap.
- Pliers: For gripping and manipulating small parts.
- New O-rings or Washers: Make sure to get the correct size for your tap.
- Replacement Hose (Optional): If the hose is damaged beyond repair.
- Plumber’s Tape (Teflon Tape): For sealing threaded connections.
- Bucket or Towel: To catch any water.
- Clean Cloth or Paper Towels: For cleaning and drying.
- Safety Glasses: To protect your eyes.
- Work Gloves: To protect your hands.
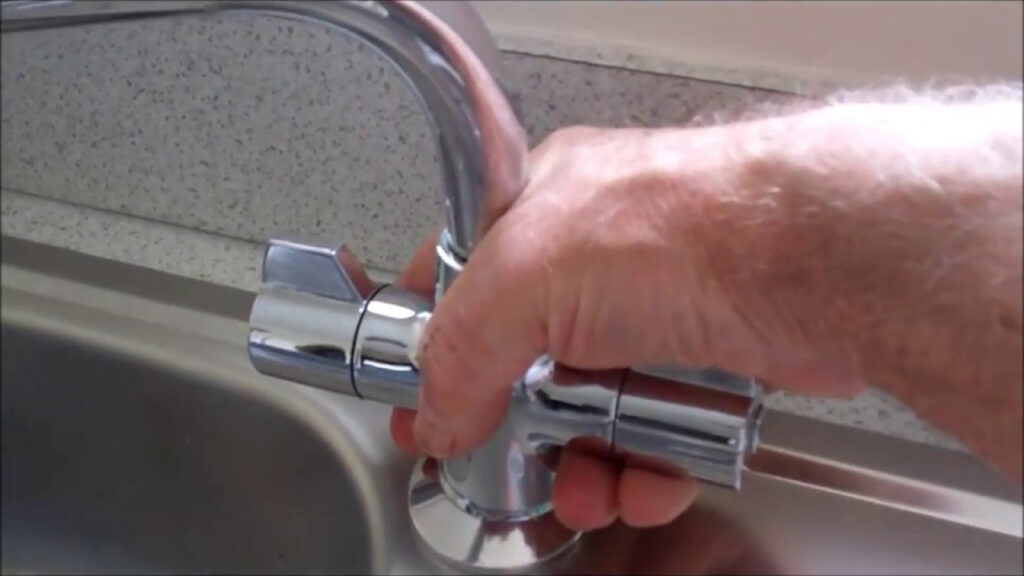
Step-by-Step Guide: How to Fix a Leaky Hose Connection
Follow these steps to repair a leaky hose connection at the bottom of your kitchen tap:
- Turn Off the Water Supply: Locate the shut-off valves under the sink for both hot and cold water. Turn them clockwise until they are completely closed. If you don’t have individual shut-off valves, you’ll need to turn off the main water supply to your house.
- Relieve Water Pressure: Turn on the tap to relieve any remaining water pressure in the lines.
- Disconnect the Hose: Place a bucket or towel under the connection to catch any residual water. Use an adjustable wrench to loosen the fitting that connects the hose to the tap body. Be careful not to overtighten or strip the threads.
- Inspect the O-ring or Washer: Once the hose is disconnected, examine the O-ring or washer inside the fitting. If it’s cracked, worn, or damaged, replace it with a new one of the correct size.
- Apply Plumber’s Tape (If Applicable): If the connection is threaded, wrap the threads with plumber’s tape in a clockwise direction. This will help create a watertight seal.
- Reconnect the Hose: Carefully reconnect the hose to the tap body, making sure the fitting is properly aligned. Tighten the fitting with an adjustable wrench, but don’t overtighten it.
- Turn On the Water Supply: Slowly turn on the shut-off valves under the sink.
- Check for Leaks: Carefully inspect the connection for any leaks. If you see any leaks, tighten the fitting slightly or repeat the process, making sure the O-ring or washer is properly seated and the plumber’s tape is applied correctly.
- Test the Tap: Turn on the tap and check for leaks while the water is running.
Troubleshooting Common Problems
Even with careful attention to detail, you may encounter some challenges during the repair process. Here are some common issues and how to address them:
- Stripped Threads: If the threads on the fitting or the tap body are stripped, you may need to replace the entire tap or the fitting.
- Corroded Fittings: If the fittings are heavily corroded, they may be difficult to remove. You can try using a penetrating oil to loosen them, but be careful not to damage the surrounding parts.
- Hard-to-Reach Connections: If the connections are in a tight or awkward space, a basin wrench can be a valuable tool.
- Persistent Leaks: If you’ve tried all the steps above and the leak persists, there may be a more serious problem with the tap or the water supply lines. In this case, it’s best to call a qualified plumber.
Preventing Future Leaks: Maintenance Tips
Preventing leaks is always better than having to fix them. Here are some tips for maintaining your kitchen tap and hose connections:
- Regular Inspections: Periodically check the connections for any signs of leaks or corrosion.
- Tighten Loose Fittings: If you notice any loose fittings, tighten them gently with an adjustable wrench.
- Replace Worn Parts: Replace O-rings and washers as needed to maintain a watertight seal.
- Avoid Overtightening: Overtightening fittings can damage the threads and lead to leaks.
- Use Quality Parts: When replacing parts, choose high-quality components that are designed to last.
When to Call a Professional Plumber
While many hose leaks can be fixed with DIY methods, certain situations warrant the expertise of a licensed plumber. If you encounter any of the following, it’s best to call a professional:
- Extensive Corrosion: If the tap or supply lines are heavily corroded, a plumber can assess the damage and recommend the best course of action.
- Damaged Pipes: If you suspect that the water supply pipes themselves are damaged, it’s crucial to have them inspected and repaired by a professional.
- Persistent Leaks: If you’ve tried all the DIY solutions and the leak persists, it may indicate a more complex problem that requires specialized knowledge and tools.
- Lack of Experience: If you’re not comfortable working with plumbing or you’re unsure about any of the steps involved, it’s always best to err on the side of caution and call a professional.
The Importance of Using Quality Replacement Parts
When repairing a leaky hose connection, it’s tempting to opt for the cheapest replacement parts available. However, using low-quality O-rings, washers, or hoses can lead to premature failure and recurring leaks. Investing in high-quality parts from reputable manufacturers ensures a more durable and reliable repair. Look for parts that are specifically designed for use in plumbing applications and that meet industry standards for safety and performance. For instance, reinforced hoses are more resistant to bursting under pressure than standard ones.
The Environmental Impact of Leaky Taps
A seemingly minor leak at the bottom of your kitchen tap can have a significant environmental impact over time. Even a small drip can waste gallons of water per day, contributing to water scarcity and increasing your water bill. By promptly addressing leaks and practicing water conservation measures, you can help protect this precious resource and reduce your environmental footprint. Consider installing low-flow aerators on your taps to further conserve water without sacrificing water pressure.
Exploring Alternative Kitchen Tap Designs
If you’re consistently experiencing problems with hose connections at the bottom of your kitchen tap, it may be worth considering alternative tap designs that minimize the risk of leaks. Some modern taps feature integrated hose connections or simplified plumbing configurations that are less prone to failure. Touchless taps, for example, can reduce wear and tear on the internal components, potentially extending their lifespan. When choosing a new tap, look for models that are known for their durability, reliability, and ease of installation. Consulting with a plumbing professional can help you select the best option for your needs and budget.
Final Thoughts on Tackling Kitchen Tap Hose Leaks
Fixing a leaky hose at the bottom of your kitchen tap is a manageable task for most homeowners. By understanding the components involved, following the steps outlined in this guide, and taking the necessary precautions, you can often resolve the issue yourself, saving time and money. Remember to prioritize safety, use quality replacement parts, and consult a professional if you encounter any difficulties. Taking proactive steps to maintain your kitchen tap and address leaks promptly will not only prevent water waste but also protect your home from potential water damage. We encourage you to share your own experiences with fixing kitchen tap leaks in the comments below; your insights could help others facing similar challenges.
