How Do You Make a Villager’s House in Minecraft? A Comprehensive Guide
Want to transform your Minecraft village from a humble settlement into a thriving community? Providing your villagers with comfortable and functional homes is key. This comprehensive guide will walk you through every step of creating the ideal villager house, from basic shelters to elaborate architectural masterpieces. We’ll cover everything from essential design principles to advanced techniques, ensuring your villagers are happy, safe, and productive. This guide emphasizes practical building tips, efficient resource management, and creative design ideas to elevate your village building skills.
Understanding Villager Housing Needs
Before diving into construction, it’s crucial to understand what villagers need in a home. At its core, a villager house needs to provide shelter from the elements and a bed for sleeping. However, to truly optimize your village and encourage villager activity, you’ll want to consider several factors.
- Beds: Each villager needs their own bed. Claimed beds are essential for villager breeding and job assignment.
- Workstations: Assigning villagers to specific professions requires corresponding workstations, such as a composter for a farmer or a lectern for a librarian.
- Doors: While not strictly required in modern Minecraft, doors were historically crucial for villager breeding mechanics. They still contribute to the aesthetic of a village.
- Lighting: Adequate lighting prevents hostile mobs from spawning inside the house, keeping your villagers safe. Torches, lanterns, and glowstone are excellent options.
- Space: Villagers need enough space to move around freely. Cramped conditions can lead to villagers wandering outside unnecessarily, making them vulnerable.
Beyond these functional requirements, aesthetics play a vital role in creating an appealing and engaging village. A well-designed village not only looks good but also enhances the overall gameplay experience.
Basic Villager House Design: The Starter Home
If you are just starting your Minecraft journey, you can create a simple yet functional villager house. This design prioritizes efficiency and ease of construction, making it an ideal starting point.
Materials Needed
- Wood planks (any type)
- Wood logs (any type)
- Glass panes
- Doors
- Beds
- Torches
Construction Steps
- Foundation: Lay out a rectangular foundation using wood planks, approximately 7×5 blocks in size.
- Walls: Build the walls two blocks high, using wood planks. Leave spaces for doors and windows.
- Windows: Place glass panes in the window openings to allow natural light.
- Doors: Install doors to provide access to the house.
- Roof: Create a simple roof using wood planks or slabs. A slightly sloped roof adds visual appeal.
- Interior: Place beds inside the house, ensuring each villager has their own. Add torches for lighting.
This basic design provides the essential elements for villager housing. You can customize it with different materials and decorations to match your personal style.
Intermediate Villager House Design: Functional and Stylish
Once you’re comfortable with basic construction, you can move on to more elaborate designs that combine functionality with aesthetics. This intermediate design incorporates workstations and additional space for villagers to interact.
Materials Needed
- Stone bricks
- Wood planks (any type)
- Wood logs (any type)
- Glass panes
- Doors
- Beds
- Torches/Lanterns
- Workstations (e.g., Composter, Lectern, Smithing Table)
Construction Steps
- Foundation: Build a larger foundation using stone bricks, approximately 9×7 blocks in size.
- Walls: Construct the walls using a combination of stone bricks and wood planks. Incorporate wood logs as support beams for added visual interest.
- Windows: Use larger glass panes or create decorative window patterns.
- Doors: Install double doors for a more grand entrance.
- Roof: Create a more detailed roof using stairs and slabs. Overhangs can add depth and dimension.
- Interior: Divide the interior into smaller rooms to create distinct living and working areas. Place beds in the sleeping area and workstations in the work area.
- Lighting: Use lanterns or strategically placed torches to provide ample lighting.
This intermediate design provides more space for villagers and incorporates workstations for job assignment. The use of different materials and decorative elements adds visual appeal and enhances the overall aesthetic of your village.
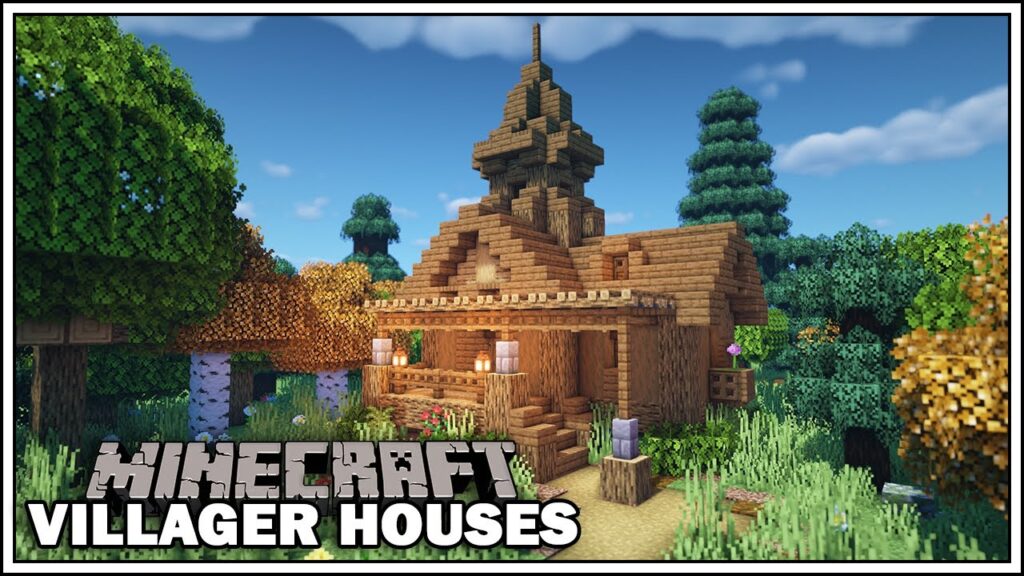
Advanced Villager House Design: Architectural Masterpieces
For experienced builders, creating advanced villager houses can be a rewarding challenge. These designs prioritize aesthetics, incorporating intricate details and advanced building techniques to create truly stunning structures.
Materials Needed
- A wide variety of building blocks (e.g., Stone bricks, Quartz, Terracotta)
- Wood planks and logs (various types)
- Glass panes and stained glass
- Doors and trapdoors
- Beds
- Lighting (e.g., Lanterns, Glowstone, Sea Lanterns)
- Decorative elements (e.g., Flower pots, Paintings, Item frames)
- Workstations
Construction Steps
- Planning: Start with a detailed plan or blueprint. Consider the overall design and layout of the house.
- Foundation: Create a large and elaborate foundation using a variety of building blocks. Incorporate different levels and textures.
- Walls: Build the walls using a combination of different materials and techniques. Use arches, pillars, and other architectural elements to add visual interest.
- Windows: Create intricate window designs using stained glass and decorative patterns.
- Doors: Install custom-designed doors or gates.
- Roof: Design a complex roof with multiple levels, slopes, and overhangs. Use different materials and textures to create a visually stunning effect.
- Interior: Divide the interior into multiple rooms and levels. Decorate each room with furniture, lighting, and decorative elements.
- Landscaping: Enhance the surrounding area with gardens, pathways, and other landscaping features.
Advanced villager house designs require significant time, resources, and skill. However, the results can be truly impressive, transforming your village into a work of art.
Optimizing Villager Happiness and Productivity
Creating beautiful villager houses is only part of the equation. To truly optimize your village, you need to ensure your villagers are happy and productive. Here are some key considerations:
- Job Assignment: Assign villagers to appropriate professions based on their workstations. This ensures they contribute to the village economy.
- Breeding: Encourage villager breeding by providing enough beds and food. A thriving population is essential for a successful village.
- Protection: Protect your villagers from hostile mobs by building walls, lighting up the area, and using iron golems.
- Trading: Establish trading relationships with villagers to acquire valuable resources and items.
- Accessibility: Ensure villagers can easily access their workstations and beds. Remove any obstacles that might hinder their movement.
By addressing these factors, you can create a thriving and sustainable village that benefits both you and your villagers.
The Role of Workstations in Villager Housing
Workstations are integral to villager life in Minecraft. They not only define a villager’s profession but also dictate their daily routines and interactions. Incorporating workstations into your villager house designs is crucial for creating a functional and immersive village.
Composter: Farmers use composters to create bone meal, which they can then use to fertilize crops.
Lectern: Librarians use lecterns to read and write books, offering valuable enchanted books for trade.
Smithing Table: Blacksmiths use smithing tables to repair and upgrade tools and armor.
Cartography Table: Cartographers use cartography tables to create and duplicate maps.
Brewing Stand: Clerics use brewing stands to brew potions, offering healing and support items.
Stonecutter: Stone masons use stonecutters to craft different stone blocks.
Essential Features of a Great Villager House
A well-designed villager house goes beyond basic shelter and incorporates features that enhance both functionality and aesthetics. Here are some essential features to consider:
- Ample Space: Villagers need enough space to move around freely and interact with their environment.
- Natural Lighting: Large windows and skylights can provide ample natural lighting, creating a more pleasant living environment.
- Ventilation: Ensure adequate ventilation to prevent the build-up of stale air. Open windows and vents can help improve air circulation.
- Storage: Provide storage space for villagers to store their belongings. Chests, barrels, and other storage containers can be incorporated into the design.
- Decoration: Decorate the house with plants, paintings, and other decorative elements to add visual appeal and create a more inviting atmosphere.
- Workstation Integration: Seamlessly integrate workstations into the house design, ensuring they are easily accessible and functional.
- Security: Protect the house from hostile mobs by using strong walls, doors, and lighting.
Benefits of Well-Designed Villager Housing
Investing time and effort into designing quality villager housing yields numerous benefits, both in terms of gameplay and aesthetics. A well-designed village is more efficient, productive, and visually appealing.
Increased Villager Happiness: Happy villagers are more productive and willing to trade. Providing them with comfortable and functional homes is essential for maintaining their happiness.
Enhanced Village Security: Well-designed houses provide better protection from hostile mobs, reducing the risk of villager deaths.
Improved Resource Management: Efficient village design can help optimize resource management, reducing waste and maximizing productivity.
Increased Trading Opportunities: Happy and productive villagers are more likely to offer valuable trades, providing you with access to rare and useful items.
Aesthetically Pleasing Environment: A well-designed village is visually appealing and creates a more immersive and enjoyable gameplay experience.
A Critical Look at Common Villager Housing Mistakes
Even experienced Minecraft players can fall victim to common mistakes when designing villager housing. Avoiding these pitfalls can significantly improve the functionality and aesthetic appeal of your village.
Overcrowding: Cramming too many villagers into a small space can lead to stress, reduced productivity, and increased vulnerability to hostile mobs.
Poor Lighting: Inadequate lighting can attract hostile mobs, putting your villagers at risk.
Lack of Workstations: Failing to provide appropriate workstations can prevent villagers from taking on professions and contributing to the village economy.
Inadequate Security: Weak walls and doors can easily be breached by hostile mobs, leaving your villagers vulnerable.
Ignoring Aesthetics: Neglecting the aesthetic appeal of your village can result in a bland and uninviting environment.
Unplanned Layout: Building without a clear plan can lead to a disorganized and inefficient village layout.
Neglecting Accessibility: Failing to ensure villagers can easily access their workstations and beds can hinder their productivity and happiness.
Reviewing the Ideal Villager House: Function Meets Form
The ideal villager house strikes a balance between functionality and form, providing a comfortable, safe, and aesthetically pleasing environment for your villagers. It incorporates essential features such as ample space, natural lighting, ventilation, storage, and decoration. The design seamlessly integrates workstations, ensuring villagers can easily perform their jobs. The house is well-lit and secure, protecting villagers from hostile mobs.
Pros:
- Provides a comfortable and safe living environment for villagers.
- Enhances village productivity and efficiency.
- Increases trading opportunities.
- Adds aesthetic appeal to the village.
- Protects villagers from hostile mobs.
Cons:
- Requires significant time and resources to build.
- May require advanced building skills.
- Can be challenging to design and plan.
- May require modifications to adapt to different village layouts.
The ideal user for this type of villager house is someone who is looking to maximize the efficiency, and aesthetic appeal of their village. This design is best suited for players who are comfortable with advanced building techniques and are willing to invest the time and resources required to create a truly stunning structure.
One alternative to this approach is to focus on simpler, more functional designs that prioritize efficiency over aesthetics. Another alternative is to use pre-made villager house designs or mods.
Overall, the ideal villager house is a valuable investment for any Minecraft player looking to create a thriving and sustainable village. While it requires significant effort and skill to build, the benefits it provides in terms of villager happiness, productivity, and security make it well worth the investment.
Crafting a Village Worth Living In
Creating the perfect villager house in Minecraft is a rewarding endeavor that combines creativity, resourcefulness, and a deep understanding of villager needs. By following the guidelines outlined in this guide, you can transform your village into a thriving community where villagers are happy, safe, and productive. Remember to prioritize functionality, aesthetics, and security, and don’t be afraid to experiment with different designs and materials. So, grab your pickaxe, gather your resources, and start building the village of your dreams!
