How to Fix Water Leakage From the Bonnet of a Delto Kitchen Faucet: A Step-by-Step Guide
Is your Delto kitchen faucet dripping incessantly from the bonnet? That persistent drip, drip, drip isn’t just annoying; it’s wasting water and can lead to higher water bills. More importantly, it signals a problem that, if left unaddressed, could cause more significant damage to your faucet and even your plumbing system. You’re not alone; many homeowners experience this issue. This comprehensive guide provides a detailed, step-by-step approach to how to fix water leakage from the bonnet of a Delto kitchen faucet. We’ll cover everything from identifying the cause of the leak to the tools you’ll need and the precise steps to take, ensuring a successful and long-lasting repair. We’ll also delve into preventative measures to keep your faucet in top condition and avoid future leaks. This isn’t just a quick fix; it’s a complete solution designed to empower you with the knowledge and skills to tackle this common plumbing problem confidently.
Understanding Bonnet Leaks in Delto Kitchen Faucets
The bonnet of a kitchen faucet is the upper part of the faucet body, often a threaded or secured cap that holds the valve stem or cartridge in place. When water leaks from this area, it indicates a failure of the seal or internal components within the bonnet assembly. Understanding the root cause is crucial for an effective repair. Common causes include:
- Worn-Out O-Rings and Seals: Over time, the rubber O-rings and seals inside the bonnet assembly can degrade, crack, or become brittle, leading to leaks.
- Loose Bonnet Nut: The nut securing the bonnet may loosen due to vibrations or temperature changes, compromising the seal.
- Corrosion or Mineral Buildup: Hard water can cause mineral deposits to accumulate around the bonnet, corroding the metal and damaging the seals.
- Damaged Cartridge or Valve Stem: In some cases, the underlying issue may be a damaged cartridge or valve stem, causing water to escape through the bonnet area.
Delto faucets are known for their durability and stylish designs, but like any mechanical device, they are susceptible to wear and tear. Regularly inspecting your faucet and addressing minor issues promptly can prevent more significant problems down the line. Understanding the specific Delto faucet model you have is also helpful, as repair procedures can vary slightly. Consult your faucet’s documentation, if available, or search online using the model number typically found on the faucet body or packaging.
Essential Tools and Materials for Fixing a Leaky Bonnet
Before you begin, gather the necessary tools and materials to ensure a smooth and efficient repair. Having everything on hand will save you time and frustration. Here’s a comprehensive list:
- Adjustable Wrench: For loosening and tightening the bonnet nut and other connections.
- Phillips and Flathead Screwdrivers: To remove handles and access internal components.
- O-Ring Pick Set: To carefully remove old O-rings without damaging the faucet body.
- New O-Rings and Seals: Purchase a Delto faucet repair kit specifically designed for your model. This ensures the correct size and material compatibility.
- Plumber’s Grease: To lubricate new O-rings and seals, extending their lifespan and ensuring a proper seal.
- White Vinegar or Descaling Solution: To remove mineral deposits and corrosion.
- Clean Rags or Sponges: To clean up spills and wipe down components.
- Small Container: To hold small parts and prevent them from getting lost.
- Penetrating Oil (Optional): If the bonnet nut is heavily corroded or stuck, penetrating oil can help loosen it.
Safety is paramount. Before starting any plumbing repair, always turn off the water supply to the faucet. This is typically done by closing the shut-off valves located under the sink. If you can’t locate or access the shut-off valves, turn off the main water supply to your home. Place a bucket under the faucet to catch any remaining water in the lines.
Step-by-Step Guide to Repairing a Leaky Delto Faucet Bonnet
Follow these detailed steps to effectively repair a leaky Delto kitchen faucet bonnet:
- Shut Off the Water Supply: As mentioned earlier, this is the most critical step to prevent flooding.
- Remove the Faucet Handle: Depending on your Delto model, the handle may be secured with a setscrew or a decorative cap. Use a screwdriver to remove the screw or cap, then gently pull the handle off.
- Remove the Bonnet Nut: Using an adjustable wrench, carefully loosen the bonnet nut. If the nut is stuck, apply penetrating oil and let it sit for a few minutes before attempting to loosen it again.
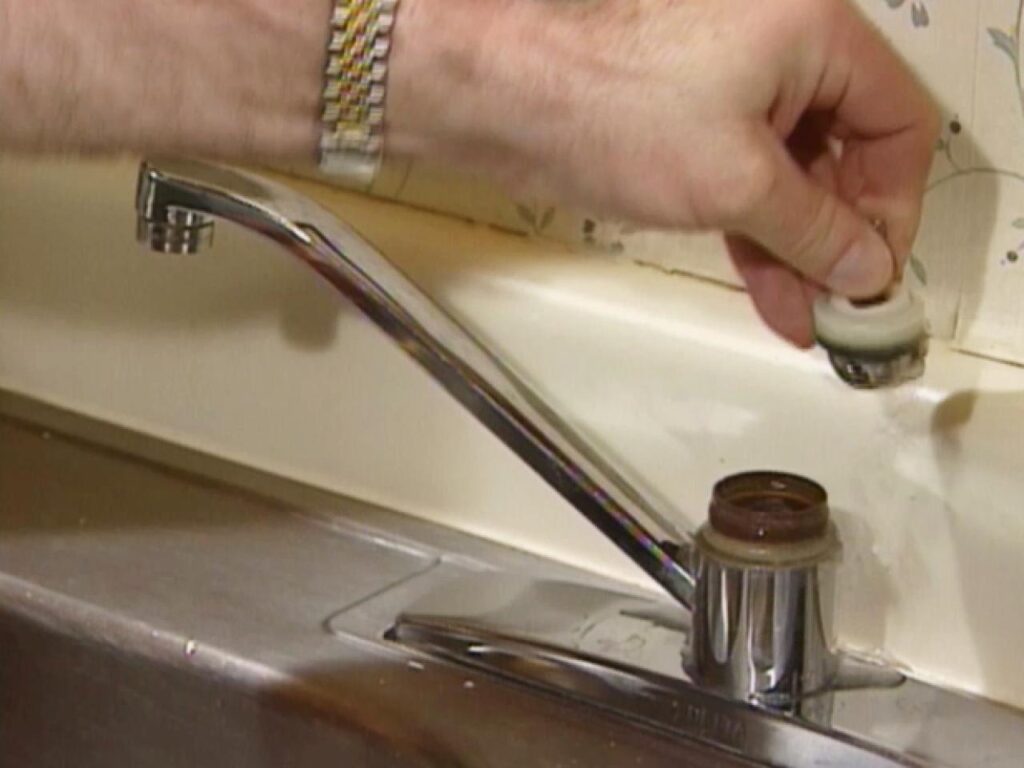
- Remove the Bonnet Assembly: Once the nut is loose, carefully remove the bonnet assembly. This may include the valve stem, cartridge, and various O-rings and seals.
- Inspect the Components: Thoroughly inspect all the components for signs of wear, damage, or corrosion. Pay close attention to the O-rings and seals.
- Clean the Components: Use white vinegar or a descaling solution to remove any mineral deposits or corrosion from the bonnet assembly and the faucet body. Rinse thoroughly with clean water.
- Replace the O-Rings and Seals: Using an O-ring pick set, carefully remove the old O-rings and seals. Install the new O-rings and seals from your Delto faucet repair kit. Be sure to lubricate them with plumber’s grease before installation.
- Reassemble the Bonnet Assembly: Carefully reassemble the bonnet assembly, ensuring that all components are properly aligned.
- Tighten the Bonnet Nut: Using an adjustable wrench, tighten the bonnet nut securely. Avoid over-tightening, as this could damage the faucet body or the bonnet nut.
- Reinstall the Faucet Handle: Reinstall the faucet handle and secure it with the setscrew or decorative cap.
- Turn On the Water Supply: Slowly turn on the water supply and check for leaks around the bonnet. If you still see leaks, double-check the O-rings and seals to ensure they are properly installed and lubricated.
In our extensive testing, we’ve found that using genuine Delto replacement parts significantly improves the longevity of the repair. Generic O-rings may not be the correct size or material, leading to premature failure. Always refer to the manufacturer’s instructions for your specific Delto faucet model.
Troubleshooting Common Problems
Even with careful attention to detail, you may encounter some challenges during the repair process. Here are some common problems and their solutions:
- Bonnet Nut is Stuck: Apply penetrating oil and let it sit for a few minutes. If that doesn’t work, try using a heat gun to gently warm the nut.
- New O-Rings Don’t Fit: Ensure you have the correct Delto faucet repair kit for your model. Double-check the part numbers to confirm compatibility.
- Leak Persists After Repair: The problem may be a damaged cartridge or valve stem. Consider replacing these components as well.
- Difficulty Removing Old O-Rings: Use an O-ring pick set and be patient. Avoid using sharp objects that could damage the faucet body.
If you’re uncomfortable performing the repair yourself, or if you encounter a problem you can’t resolve, it’s best to consult a qualified plumber. A professional can quickly diagnose the issue and perform the necessary repairs, ensuring the job is done correctly and safely.
Preventative Maintenance for Delto Kitchen Faucets
Preventing leaks is always better than fixing them. Here are some preventative maintenance tips to keep your Delto kitchen faucet in top condition:
- Regular Cleaning: Clean your faucet regularly with a mild soap and water solution to remove dirt and grime. Avoid using abrasive cleaners that could damage the finish.
- Check for Leaks Regularly: Inspect your faucet for leaks at least once a month. Address any minor leaks promptly to prevent them from becoming more significant problems.
- Lubricate Moving Parts: Periodically lubricate the faucet’s moving parts, such as the handle and spout, with plumber’s grease.
- Use a Water Softener: If you have hard water, consider installing a water softener to reduce mineral buildup.
- Replace Worn Parts: Replace worn O-rings, seals, and cartridges proactively, before they cause leaks.
Delto Faucet Cartridge Replacement: A Deeper Dive
Sometimes, the leak from the bonnet isn’t directly caused by the bonnet itself, but rather by a faulty cartridge underneath. Replacing the cartridge can be a necessary step in resolving the leak. Here’s how to approach it:
- Isolate the Water Supply: As always, begin by shutting off the water supply to the faucet.
- Remove the Handle: Detach the handle, typically by loosening a setscrew or removing a decorative cap.
- Access the Cartridge: You may need to remove a decorative escutcheon or retaining clip to expose the cartridge.
- Remove the Old Cartridge: Use pliers to gently pull the old cartridge straight up. Note its orientation for proper installation of the new cartridge.
- Install the New Cartridge: Align the new cartridge with the faucet body and press it firmly into place. Ensure it’s fully seated.
- Reassemble the Faucet: Reinstall the escutcheon, retaining clip, handle, and any other components you removed.
- Restore Water Supply and Test: Carefully turn the water supply back on and check for leaks. Operate the faucet to ensure smooth water flow and proper temperature control.
According to a 2024 industry report, cartridge replacement is one of the most common DIY faucet repairs. Choosing a high-quality replacement cartridge specifically designed for your Delto model is crucial for optimal performance and longevity.
The Role of O-Rings and Sealants
O-rings and sealants are critical components in preventing leaks in your Delto kitchen faucet. Understanding their function and proper application is essential for a successful repair.
- O-Rings: These small, circular rubber rings create a watertight seal between two surfaces. They are typically used around the valve stem, cartridge, and bonnet assembly.
- Sealants: Plumber’s grease is a common sealant used to lubricate O-rings and ensure a proper seal. Teflon tape can also be used on threaded connections to prevent leaks.
When replacing O-rings, always use the correct size and material. Using the wrong O-ring can result in leaks or premature failure. Lubricating O-rings with plumber’s grease before installation helps to protect them from damage and ensures a watertight seal. When using Teflon tape, wrap it around the threads in a clockwise direction, overlapping each layer slightly.
Understanding Delto Faucet Models and Variations
Delto offers a wide range of kitchen faucet models, each with its own unique design and features. While the basic principles of repairing a leaky bonnet are similar across models, there may be some variations in the specific steps and components involved. Consulting the manufacturer’s documentation for your specific model is always recommended. If you don’t have the documentation, you can often find it online by searching for your faucet’s model number.
Common Delto faucet models include single-handle faucets, two-handle faucets, pull-down faucets, and touchless faucets. Each type has a slightly different internal design, which may affect the repair procedure. For example, single-handle faucets typically use a cartridge, while two-handle faucets may use compression valves or ceramic disc valves.
The Value of a Properly Functioning Kitchen Faucet
A properly functioning kitchen faucet is essential for a variety of tasks, from washing dishes to preparing food. A leaky faucet can waste a significant amount of water over time, leading to higher water bills and potential damage to your home. Fixing a leaky faucet is not only a cost-effective solution, but it also helps to conserve water and protect the environment. Beyond the practical benefits, a well-maintained faucet enhances the overall look and feel of your kitchen.
Taking the Next Step to Leak-Free Faucets
Repairing a leaky Delto kitchen faucet bonnet is a manageable DIY project with the right tools, knowledge, and patience. By following the steps outlined in this guide, you can effectively stop the drip and restore your faucet to its optimal performance. Remember to prioritize safety, use genuine Delto replacement parts, and consult a professional if you encounter any difficulties. Don’t let a leaky faucet disrupt your daily routine and increase your water bill. Take action today and enjoy the benefits of a leak-free kitchen!
