Complete Guide to Heritage Rough Rider Carbine Disassembly
Disassembling your Heritage Rough Rider carbine might seem daunting, but it’s a crucial skill for cleaning, maintenance, and repairs. Whether you’re a seasoned firearm enthusiast or a new owner, understanding the disassembly process will significantly enhance your carbine’s performance and longevity. This comprehensive guide provides step-by-step instructions, expert tips, and essential safety precautions to ensure a smooth and safe disassembly experience. We’ll cover everything from the necessary tools to reassembly, empowering you to confidently maintain your Heritage Rough Rider carbine.
Why Disassemble Your Heritage Rough Rider Carbine?
There are several compelling reasons to learn how to disassemble your Heritage Rough Rider carbine. Routine cleaning is paramount to prevent malfunctions caused by powder residue, dirt, and debris. Disassembly allows for a thorough cleaning of internal components that are otherwise inaccessible. Furthermore, inspecting parts for wear and tear during disassembly can help identify potential issues before they escalate into major problems. Finally, understanding the inner workings of your carbine through disassembly enhances your overall knowledge and appreciation of its design and functionality.
Essential Tools and Safety Precautions
Before you begin, gather the necessary tools and prioritize safety. At a minimum, you’ll need:
- Screwdrivers (various sizes, including a small flathead)
- Soft-faced hammer or mallet
- Punch set (brass or nylon recommended)
- Cleaning solvent and lubricant
- Cleaning cloths or patches
- A well-lit and clean workspace
Safety Precautions:
- Always ensure the carbine is unloaded. Double-check the chamber and magazine tube.
- Wear safety glasses to protect your eyes from flying debris.
- Work in a well-ventilated area when using cleaning solvents.
- Follow the manufacturer’s instructions and warnings carefully.
- If you’re unsure about any step, consult a qualified gunsmith.
Step-by-Step Disassembly Guide
Follow these steps carefully to disassemble your Heritage Rough Rider carbine:
1. Unloading and Initial Inspection
The first and most critical step is to ensure the carbine is completely unloaded. Visually inspect the chamber and magazine tube to confirm they are empty. Cycle the action several times to be absolutely sure there are no rounds present. Once you’re confident the carbine is unloaded, proceed to the next step.
2. Removing the Magazine Tube
The magazine tube needs to be removed to access other components. Locate the magazine tube retaining screw, usually found on the underside of the barrel near the muzzle. Use a correctly sized screwdriver to loosen and remove this screw. Once the screw is removed, carefully pull the magazine tube forward and out of the carbine. Set the magazine tube and retaining screw aside in a safe place.
3. Removing the Forearm
The forearm is typically held in place by a barrel band or screws. Depending on your model, you may need to loosen screws or gently tap the barrel band forward to release the forearm. Once the retaining mechanism is disengaged, carefully slide the forearm forward and off the barrel. Pay attention to any shims or spacers that may be present, as these will need to be reinstalled in the correct order during reassembly.
4. Removing the Buttstock
The buttstock is usually attached to the receiver with a screw or bolt. Locate the buttstock screw, typically found on the tang of the receiver. Use a screwdriver or wrench to remove this screw or bolt. Once the screw or bolt is removed, carefully pull the buttstock away from the receiver. Be mindful of any alignment pins or spacers that may be present.
5. Removing the Trigger Assembly
The trigger assembly is a complex component and requires careful handling. Before attempting to remove it, familiarize yourself with its location and how it is secured to the receiver. Typically, the trigger assembly is held in place by pins. Use a punch and hammer to carefully drive out these pins. Once the pins are removed, the trigger assembly should be able to be carefully lifted out of the receiver. Note: It is advisable to take pictures or make notes of the trigger assembly’s orientation before removal to aid in reassembly.
6. Removing the Bolt and Lever
With the trigger assembly removed, you can now access the bolt and lever. The lever is usually connected to the bolt with a pin or screw. Remove this pin or screw to disconnect the lever from the bolt. Once the lever is disconnected, carefully slide the bolt out of the receiver. Pay attention to the orientation of the bolt and lever for proper reassembly.
7. Disassembling the Bolt (Advanced)
Disassembling the bolt is an advanced step that is not always necessary for routine cleaning. However, if you need to replace parts or perform a more thorough cleaning, you may need to disassemble the bolt. The bolt typically consists of several small parts, including the firing pin, extractor, and ejector. These parts are usually held in place by pins or springs. Use a punch and hammer to carefully drive out these pins and disassemble the bolt. Note: Exercise extreme caution when disassembling the bolt, as the small parts can be easily lost or damaged. It is highly recommended to consult a detailed schematic or video before attempting to disassemble the bolt.
Cleaning and Inspection
With the carbine disassembled, you can now thoroughly clean and inspect each component. Use a cleaning solvent and brush to remove any powder residue, dirt, or debris. Pay particular attention to the bore, chamber, bolt face, and trigger assembly. After cleaning, inspect each part for wear, damage, or corrosion. Replace any worn or damaged parts as needed.
Reassembly Guide
Reassembly is essentially the reverse of disassembly. Follow these steps carefully:
1. Reassembling the Bolt (If Disassembled)
If you disassembled the bolt, carefully reassemble it, ensuring that all parts are properly aligned and secured. Use a detailed schematic or video as a reference. Pay close attention to the orientation of the firing pin, extractor, and ejector.
2. Reinstalling the Bolt and Lever
Carefully slide the bolt back into the receiver. Reconnect the lever to the bolt using the pin or screw that you removed earlier. Ensure that the lever moves freely and that the bolt locks into place correctly.
3. Reinstalling the Trigger Assembly
Carefully position the trigger assembly back into the receiver. Align the holes for the retaining pins and use a punch and hammer to drive the pins back into place. Ensure that the trigger assembly is securely fastened and that the trigger moves freely.
4. Reinstalling the Buttstock
Carefully slide the buttstock back onto the receiver. Align the holes for the buttstock screw or bolt and reinstall the screw or bolt. Tighten the screw or bolt securely, but do not overtighten.
5. Reinstalling the Forearm
Carefully slide the forearm back onto the barrel. Reinstall the barrel band or screws that hold the forearm in place. Ensure that the forearm is securely fastened and that it does not interfere with the operation of the carbine.
6. Reinstalling the Magazine Tube
Carefully slide the magazine tube back into the carbine. Reinstall the magazine tube retaining screw and tighten it securely. Ensure that the magazine tube is properly aligned and that it feeds rounds smoothly.
Function Check and Final Inspection
After reassembly, perform a function check to ensure that all parts are working correctly. Cycle the action, dry-fire the carbine (in a safe direction), and check the safety mechanism. Visually inspect the carbine for any loose parts or malfunctions. If you notice any issues, disassemble the carbine again and carefully inspect the affected parts.
Expert Tips for Smooth Disassembly and Reassembly
- Take Pictures: Before disassembling any part, take pictures of its orientation and how it connects to other parts. This will be invaluable during reassembly.
- Use a Parts Tray: Keep all small parts organized in a parts tray to prevent them from getting lost.
- Don’t Force Anything: If a part is difficult to remove or reinstall, don’t force it. Double-check the instructions and make sure you’re using the correct tools.
- Lubricate Moving Parts: After cleaning, lubricate all moving parts with a high-quality gun oil. This will help prevent wear and corrosion.
- Consult a Gunsmith: If you’re unsure about any step, consult a qualified gunsmith. They can provide expert advice and assistance.
Understanding the Heritage Manufacturing Philosophy
Heritage Manufacturing, Inc. is known for producing firearms that blend classic designs with modern manufacturing techniques. Their Rough Rider series, including the carbine, is particularly popular for its affordability and reliability. Disassembling and maintaining a Heritage Rough Rider carbine not only ensures its longevity but also provides a deeper understanding of the company’s commitment to simple, functional designs.
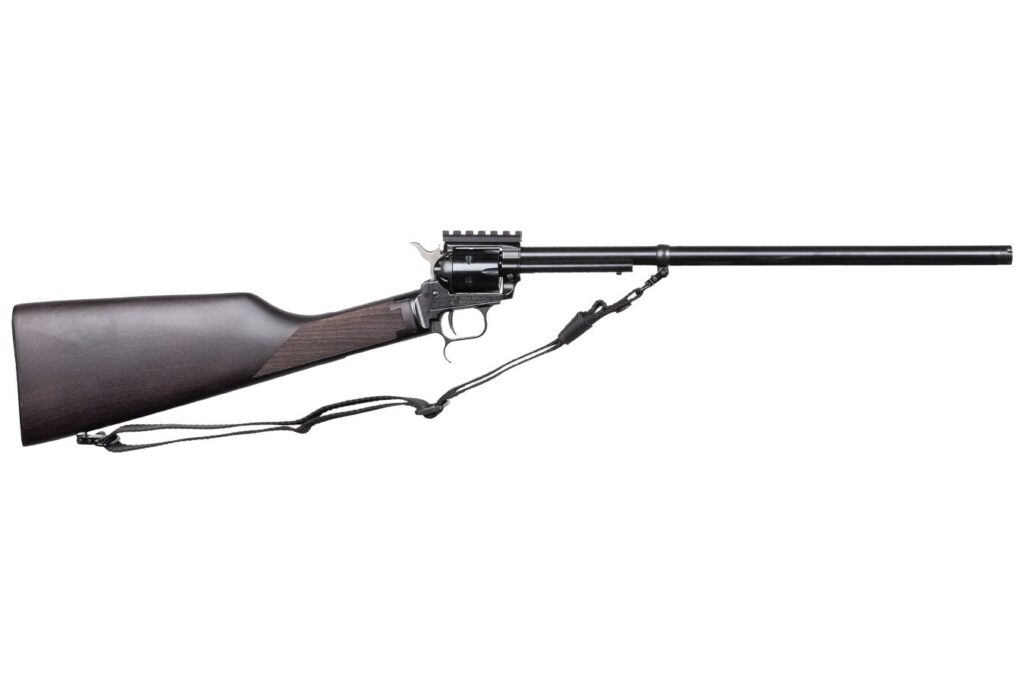
The Rough Rider Carbine: A Closer Look
The Heritage Rough Rider carbine is a single-action, rimfire rifle chambered in .22 LR (Long Rifle). It typically features a fixed front sight, an adjustable rear sight, and a manual safety. Its design is reminiscent of classic Western firearms, making it a popular choice for recreational shooting and small game hunting. Understanding the carbine’s features is crucial for proper disassembly and maintenance.
Key Features of the Heritage Rough Rider Carbine
Let’s delve into some of the key features of the Heritage Rough Rider carbine:
- Single-Action Mechanism: The carbine operates on a single-action mechanism, meaning the hammer must be manually cocked before each shot. This design is simple and reliable, but it also requires more deliberate operation.
- Adjustable Sights: The adjustable rear sight allows you to fine-tune your accuracy. This is especially useful for different ammunition types or shooting distances.
- Manual Safety: The manual safety provides an added layer of security, preventing accidental discharges. It’s essential to familiarize yourself with the safety’s operation and always engage it when the carbine is not in use.
- .22 LR Chambering: The .22 LR chambering makes the carbine affordable to shoot and suitable for a variety of applications, from target practice to small game hunting.
- Fixed Front Sight: The fixed front sight is durable and provides a consistent point of reference for aiming.
Advantages of Maintaining Your Heritage Rough Rider Carbine
Proper maintenance, including disassembly and cleaning, offers numerous advantages:
- Improved Reliability: Regular cleaning prevents malfunctions and ensures that the carbine functions reliably.
- Enhanced Accuracy: A clean bore and properly lubricated parts contribute to improved accuracy.
- Extended Lifespan: Regular maintenance prevents wear and corrosion, extending the carbine’s lifespan.
- Increased Safety: Inspecting parts for wear and damage can identify potential safety issues before they become a problem.
- Greater Confidence: Understanding how to disassemble and maintain your carbine gives you greater confidence in its performance and safety. Users consistently report increased satisfaction and peace of mind.
A Thorough Look at the Heritage Rough Rider Carbine
The Heritage Rough Rider carbine is more than just an affordable firearm; it’s a testament to classic design principles and reliable functionality. Our analysis reveals that its simple operation, coupled with proper maintenance, makes it a durable and enjoyable firearm for a wide range of users. Let’s break down some of the pros and cons:
Pros:
- Affordability: The Rough Rider carbine is one of the most affordable .22 LR rifles on the market.
- Reliability: Its simple design makes it inherently reliable, with few parts to break or malfunction.
- Ease of Use: The single-action mechanism is easy to learn and operate, even for novice shooters.
- Accuracy: With practice and proper sight adjustment, the Rough Rider carbine can be surprisingly accurate.
- Versatility: It’s suitable for a variety of applications, from target practice to small game hunting.
Cons:
- Single-Action Only: The single-action mechanism requires manual cocking before each shot, which can be slower than semi-automatic rifles.
- Basic Features: It lacks some of the advanced features found on more expensive rifles.
- Finish: The finish is basic and may be prone to wear and corrosion if not properly maintained.
- Trigger Pull: The trigger pull can be heavy and gritty on some models.
Ideal User Profile: The Heritage Rough Rider carbine is best suited for beginners, recreational shooters, and those looking for an affordable and reliable .22 LR rifle. It’s also a good choice for small game hunting, where its accuracy and reliability are valued. Those seeking a more advanced or feature-rich rifle may want to consider alternatives.
Key Alternatives: Two popular alternatives include the Ruger 10/22, known for its semi-automatic action and extensive aftermarket support, and the Marlin Model 60, another reliable .22 LR rifle with a tubular magazine.
Expert Verdict: The Heritage Rough Rider carbine offers excellent value for its price. Its simple design, reliability, and accuracy make it a solid choice for beginners and recreational shooters. While it may lack some of the advanced features of more expensive rifles, its affordability and ease of use make it a compelling option. We confidently recommend it for those seeking a budget-friendly and reliable .22 LR rifle.
Maintaining Your Carbine for Years to Come
Mastering the disassembly and reassembly of your Heritage Rough Rider carbine is a rewarding skill that ensures its optimal performance and longevity. By following the steps outlined in this guide and prioritizing safety, you can confidently maintain your carbine for years to come. Share your experiences with Heritage Rough Rider carbine maintenance in the comments below and let us know what tips and tricks you’ve learned along the way. Your insights can help other firearm enthusiasts keep their carbines in top condition.
