Conquering the Dreaded Leak Under Sink in Kitchen: A Comprehensive Guide
Discovering a leak under sink in kitchen can be a homeowner’s nightmare. The steady drip, the potential for water damage, and the general inconvenience can quickly turn a minor issue into a major headache. But don’t despair! This comprehensive guide is designed to equip you with the knowledge and confidence to identify, troubleshoot, and even potentially fix a leak under your kitchen sink. We’ll explore the common causes, provide step-by-step troubleshooting techniques, and offer expert advice to help you protect your home from water damage. Our goal is to empower you with a deep understanding of plumbing systems and problem-solving, ensuring you can tackle this challenge effectively.
Understanding the Anatomy of a Kitchen Sink Plumbing System
Before diving into leak detection, it’s crucial to understand the components of your kitchen sink’s plumbing. Knowing these parts is key to isolating the source of the leak under sink in kitchen.
- Supply Lines: These flexible tubes connect your shut-off valves to the faucet. They deliver hot and cold water to the faucet.
- Shut-Off Valves: Located under the sink, these valves control the water supply to the faucet. They allow you to turn off the water for repairs without shutting off the entire house.
- Faucet: The fixture that dispenses water into the sink. Leaks can occur around the base, spout, or handles.
- Sink Basin: The actual sink bowl where water collects. Leaks can occur around the drain or where the sink meets the countertop.
- Drain Assembly: The system of pipes that carries wastewater away from the sink. This includes the strainer, tailpiece, P-trap, and drainpipe.
- P-Trap: The curved section of pipe under the sink that traps debris and prevents sewer gases from entering your home.
- Garbage Disposal (Optional): An appliance that grinds food waste before it enters the drain. This can be a common source of leaks.
- Dishwasher Connection (Optional): A hose that connects the dishwasher to the sink’s drainpipe.
Familiarizing yourself with these components will make diagnosing a leak under sink in kitchen much easier.
Common Causes of a Leak Under Kitchen Sink
Several factors can contribute to a leak under sink in kitchen. Identifying the root cause is the first step toward a successful repair.
- Loose Connections: Over time, connections between pipes and fittings can loosen due to vibrations and changes in water pressure.
- Worn-Out Washers and O-Rings: These rubber components create seals between parts. As they age, they can become brittle and crack, leading to leaks.
- Corrosion: Mineral buildup and corrosion can damage pipes and fittings, creating weak spots that leak.
- Clogged Drains: A clogged drain can cause water to back up into the sink and put pressure on the drain assembly, leading to leaks.
- Damaged Pipes: Physical damage to pipes, such as cracks or dents, can result in leaks.
- High Water Pressure: Excessive water pressure can stress plumbing components and cause them to fail.
- Faulty Faucet: Internal components of the faucet can wear out or break, leading to leaks from the spout, handles, or base.
- Improper Installation: If the sink or plumbing was not installed correctly, leaks may occur from the start or develop over time.
Understanding these common causes will help you narrow down the source of your leak under sink in kitchen.
Step-by-Step Troubleshooting Guide for Identifying the Leak Source
Finding the exact source of a leak under sink in kitchen requires a systematic approach. Follow these steps to pinpoint the problem:
- Preparation: Clear the area under the sink. Remove any items that could get wet or obstruct your view. Place a bucket or towels under the sink to catch dripping water.
- Dry the Area: Use a clean cloth or paper towels to thoroughly dry all visible pipes, fittings, and connections. This will make it easier to spot the leak.
- Visual Inspection: Carefully examine all parts of the plumbing system, starting with the supply lines and working your way down to the drain. Look for signs of water droplets, wet spots, or mineral buildup.
- Run the Faucet: Turn on both the hot and cold water, one at a time, and observe the faucet and supply lines for leaks. Check around the base of the faucet, the spout, and the handles.
- Check the Drain: Fill the sink with water and then release the drain. Watch the drain assembly for leaks, paying close attention to the connections between the strainer, tailpiece, P-trap, and drainpipe.
- Inspect the Garbage Disposal (If Applicable): Run the garbage disposal and check for leaks around the disposal unit and its connections to the drainpipe.
- Feel for Moisture: If you can’t see the leak, run your fingers along the pipes and fittings to feel for moisture.
- Use a Mirror and Flashlight: A small mirror and flashlight can help you inspect hard-to-reach areas.
- Tighten Connections: If you find a loose connection, gently tighten it with a wrench. Be careful not to overtighten, as this could damage the fitting.
- Replace Washers and O-Rings: If you suspect a worn-out washer or O-ring, replace it with a new one.
By following these steps carefully, you should be able to identify the source of the leak under sink in kitchen.
Tools and Materials You’ll Need for Common Repairs
Before attempting any repairs to address a leak under sink in kitchen, gather the necessary tools and materials. Having everything on hand will make the job easier and more efficient.
- Adjustable Wrench: For tightening and loosening nuts and fittings.
- Basin Wrench: For reaching nuts in tight spaces, such as behind the sink.
- Pliers: For gripping and holding pipes and fittings.
- Screwdrivers (Phillips and Flathead): For removing screws from faucets and other components.
- Plumber’s Tape (Teflon Tape): For sealing threaded connections.
- Plumber’s Putty: For sealing around the sink strainer and faucet base.
- Replacement Washers and O-Rings: In various sizes to fit different plumbing components.
- Replacement Supply Lines: If the existing supply lines are damaged or corroded.
- Bucket: For catching water.
- Towels: For cleaning up spills and drying the area.
- Safety Glasses: To protect your eyes from debris.
- Gloves: To protect your hands.
Having these tools and materials readily available will help you tackle most common leak under sink in kitchen repairs.
Simple DIY Repairs for Minor Leaks
Many minor leaks can be easily fixed with some basic DIY skills. Here are a few common repairs you can try to address a leak under sink in kitchen:
- Tightening Loose Connections: Use an adjustable wrench to gently tighten any loose nuts or fittings. Be careful not to overtighten, as this could damage the fitting.
- Replacing Washers and O-Rings: Turn off the water supply to the faucet. Disassemble the leaking component and replace the worn-out washer or O-ring with a new one.
- Sealing Threaded Connections: Remove the old plumber’s tape from the threaded connection. Wrap the threads with new plumber’s tape, overlapping each layer. Reassemble the connection.
- Applying Plumber’s Putty: Remove the leaking component, such as the sink strainer. Clean the area thoroughly. Apply a ring of plumber’s putty around the base of the component and reassemble it.
- Replacing Supply Lines: Turn off the water supply to the faucet. Disconnect the old supply lines and replace them with new ones. Be sure to use plumber’s tape on the threaded connections.
These simple DIY repairs can often resolve minor leaks and prevent further water damage from a leak under sink in kitchen.
When to Call a Professional Plumber
While many leaks can be fixed with DIY repairs, some situations require the expertise of a licensed plumber. It’s best to call a professional for a leak under sink in kitchen when:
- You can’t identify the source of the leak: If you’ve tried troubleshooting and still can’t find the leak, a plumber can use specialized tools and techniques to locate it.
- The leak is severe: A large or constant leak can cause significant water damage and should be addressed immediately by a plumber.
- The pipes are corroded or damaged: Corroded or damaged pipes may require replacement, which is best left to a professional.
- You’re uncomfortable working with plumbing: If you’re not confident in your DIY skills, it’s best to call a plumber to avoid making the problem worse.
- You suspect a more serious plumbing issue: A leak could be a sign of a larger plumbing problem, such as a slab leak or a sewer line issue. A plumber can diagnose and repair these problems.
Knowing when to call a plumber can save you time, money, and potential headaches when facing a leak under sink in kitchen.
Preventive Measures to Avoid Future Leaks
Preventing leaks is always better than dealing with the aftermath. Here are some preventive measures you can take to avoid future incidents of a leak under sink in kitchen:
- Regular Inspections: Periodically inspect the plumbing under your sink for signs of leaks, corrosion, or damage.
- Tighten Connections: Check the tightness of nuts and fittings regularly and tighten them as needed.
- Replace Washers and O-Rings: Replace worn-out washers and O-rings before they start to leak.
- Avoid Overloading the Garbage Disposal: Only dispose of food waste that is safe for the garbage disposal. Avoid putting large quantities of food down the drain at once.
- Flush the Drain Regularly: Flush the drain with hot water and baking soda to prevent clogs.
- Monitor Water Pressure: High water pressure can stress plumbing components. Consider installing a pressure regulator to reduce water pressure.
- Insulate Pipes: Insulate pipes in unheated areas to prevent them from freezing and bursting in cold weather.
By taking these preventive measures, you can significantly reduce the risk of future leaks under your kitchen sink and maintain a healthy plumbing system.
Understanding Plumbing Codes and Regulations
Plumbing codes and regulations are in place to ensure the safety and proper functioning of plumbing systems. While addressing a leak under sink in kitchen, it’s important to be aware of these codes, as some repairs may require permits or inspections.
- Local Codes: Plumbing codes vary by location. Check with your local building department to determine the specific codes in your area.
- Permits: Some plumbing repairs, such as replacing pipes or installing new fixtures, may require a permit.
- Inspections: After completing certain plumbing repairs, you may need to have the work inspected by a building inspector to ensure it meets code requirements.
- Licensed Plumbers: Many jurisdictions require plumbing work to be performed by a licensed plumber.
Familiarizing yourself with plumbing codes and regulations will help you ensure that your repairs are done safely and legally while fixing a leak under sink in kitchen.
The Environmental Impact of Water Leaks
Water leaks, even small ones, can have a significant impact on the environment. Addressing a leak under sink in kitchen promptly helps conserve water and reduce your environmental footprint.
- Water Waste: Leaks waste a significant amount of water each year. Even a small drip can add up to gallons of water wasted over time.
- Energy Consumption: Water leaks can increase energy consumption, as it takes energy to pump and treat water.
- Water Scarcity: In areas with water scarcity, leaks can exacerbate the problem.
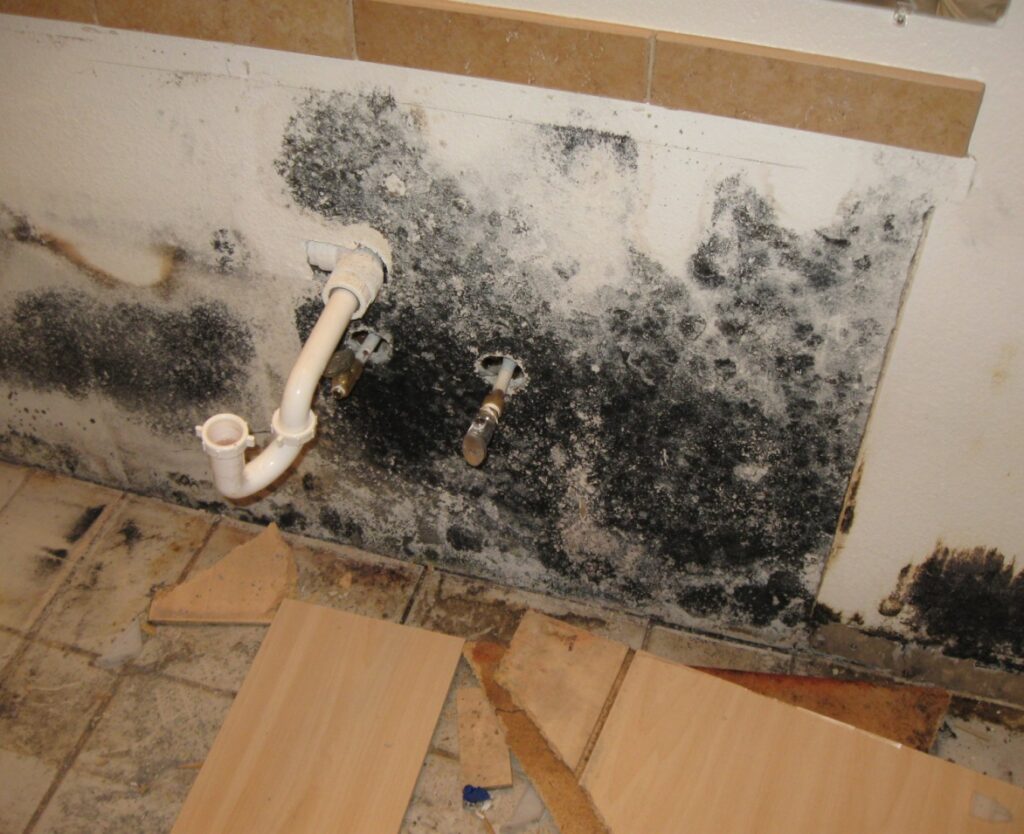
- Environmental Damage: Water leaks can damage property and contribute to mold growth, which can have negative health impacts.
By fixing leaks promptly and conserving water, you can help protect the environment and ensure a sustainable future. Addressing the leak under sink in kitchen is one small step that can make a big difference.
Finding Reliable Plumbing Services for Complex Repairs
When you need to call a professional plumber to address a complex leak under sink in kitchen, it’s important to choose a reliable and qualified service. Here are some tips for finding a reputable plumber:
- Ask for Recommendations: Ask friends, family, or neighbors for recommendations.
- Check Online Reviews: Read online reviews on websites like Google, Yelp, and Angie’s List.
- Verify Licensing and Insurance: Make sure the plumber is licensed and insured in your state or locality.
- Get Multiple Quotes: Get quotes from several plumbers before making a decision.
- Ask About Experience: Ask about the plumber’s experience with similar types of repairs.
- Check for Guarantees: Ask if the plumber offers a guarantee on their work.
By following these tips, you can find a reliable plumber who can provide quality service and resolve your plumbing issues effectively. Getting the right expert to resolve your leak under sink in kitchen is important.
Taking Control of Your Kitchen Plumbing
Dealing with a leak under sink in kitchen doesn’t have to be a source of stress. By understanding the components of your plumbing system, knowing the common causes of leaks, and following the troubleshooting steps outlined in this guide, you can confidently identify and often fix minor leaks yourself. Remember, preventative maintenance and prompt action are key to avoiding costly water damage and ensuring the longevity of your kitchen plumbing.
